Create a menu based Shortcut
Want to organise and access your favourite apps with ease? A menu-based shortcut is the way to go! Apple’s folders and widgets can be helpful, but they can also get messy. A menu-based shortcut is a cleaner and simpler solution. With a little creativity, you can turn your iPhone into a productivity powerhouse. Give it a try today and see how much easier it makes your life!
·
Jan 21, 2025
iOS Shortcuts is a powerful tool that allows you to automate tasks and streamline your daily interactions with your iPhone or iPad. One particularly versatile feature is creating menu-based shortcuts, which let you select from a list of options and perform different actions based on your choice. In this guide, we’ll walk you through creating a shortcut that opens different applications depending on the option selected from a menu.
---
Why Create a Menu-Based Shortcut?
Over the years, Apple has introduced several features to help users organise their iOS devices. In 2010, with the release of iOS 4, Apple launched folders, allowing users to group apps together for easier access (12 max for iPhone and 20 Max for iPad). Then in iOS 14 (2020), widgets were introduced, enabling users to add customisable information panels to their Home Screens.
While these features have been incredibly useful, they can also contribute to a more cluttered and overwhelming Home Screen. Folders can become overstuffed, and widgets, while visually appealing, take up valuable space. This is where menu-based shortcuts shine – they offer a clean and efficient way to access your favourite apps or workflows without adding to the chaos.
With a menu-based shortcut, you can:
- Access frequently used apps more quickly.
- Reduce the clutter on your Home Screen.
- Customise workflows for different tasks or scenarios.
Imagine you want to group your most-used productivity apps into a single shortcut. Instead of launching apps individually or scrolling through folders, you can create a menu that lists them and opens the desired app with a single tap. It’s like having a mini control centre tailored just for you.
---
Step 1: Open the Shortcuts App
1. Launch the Shortcuts app on your iPhone or iPad.
2. Tap the + icon in the top-right corner to create a new shortcut.
---
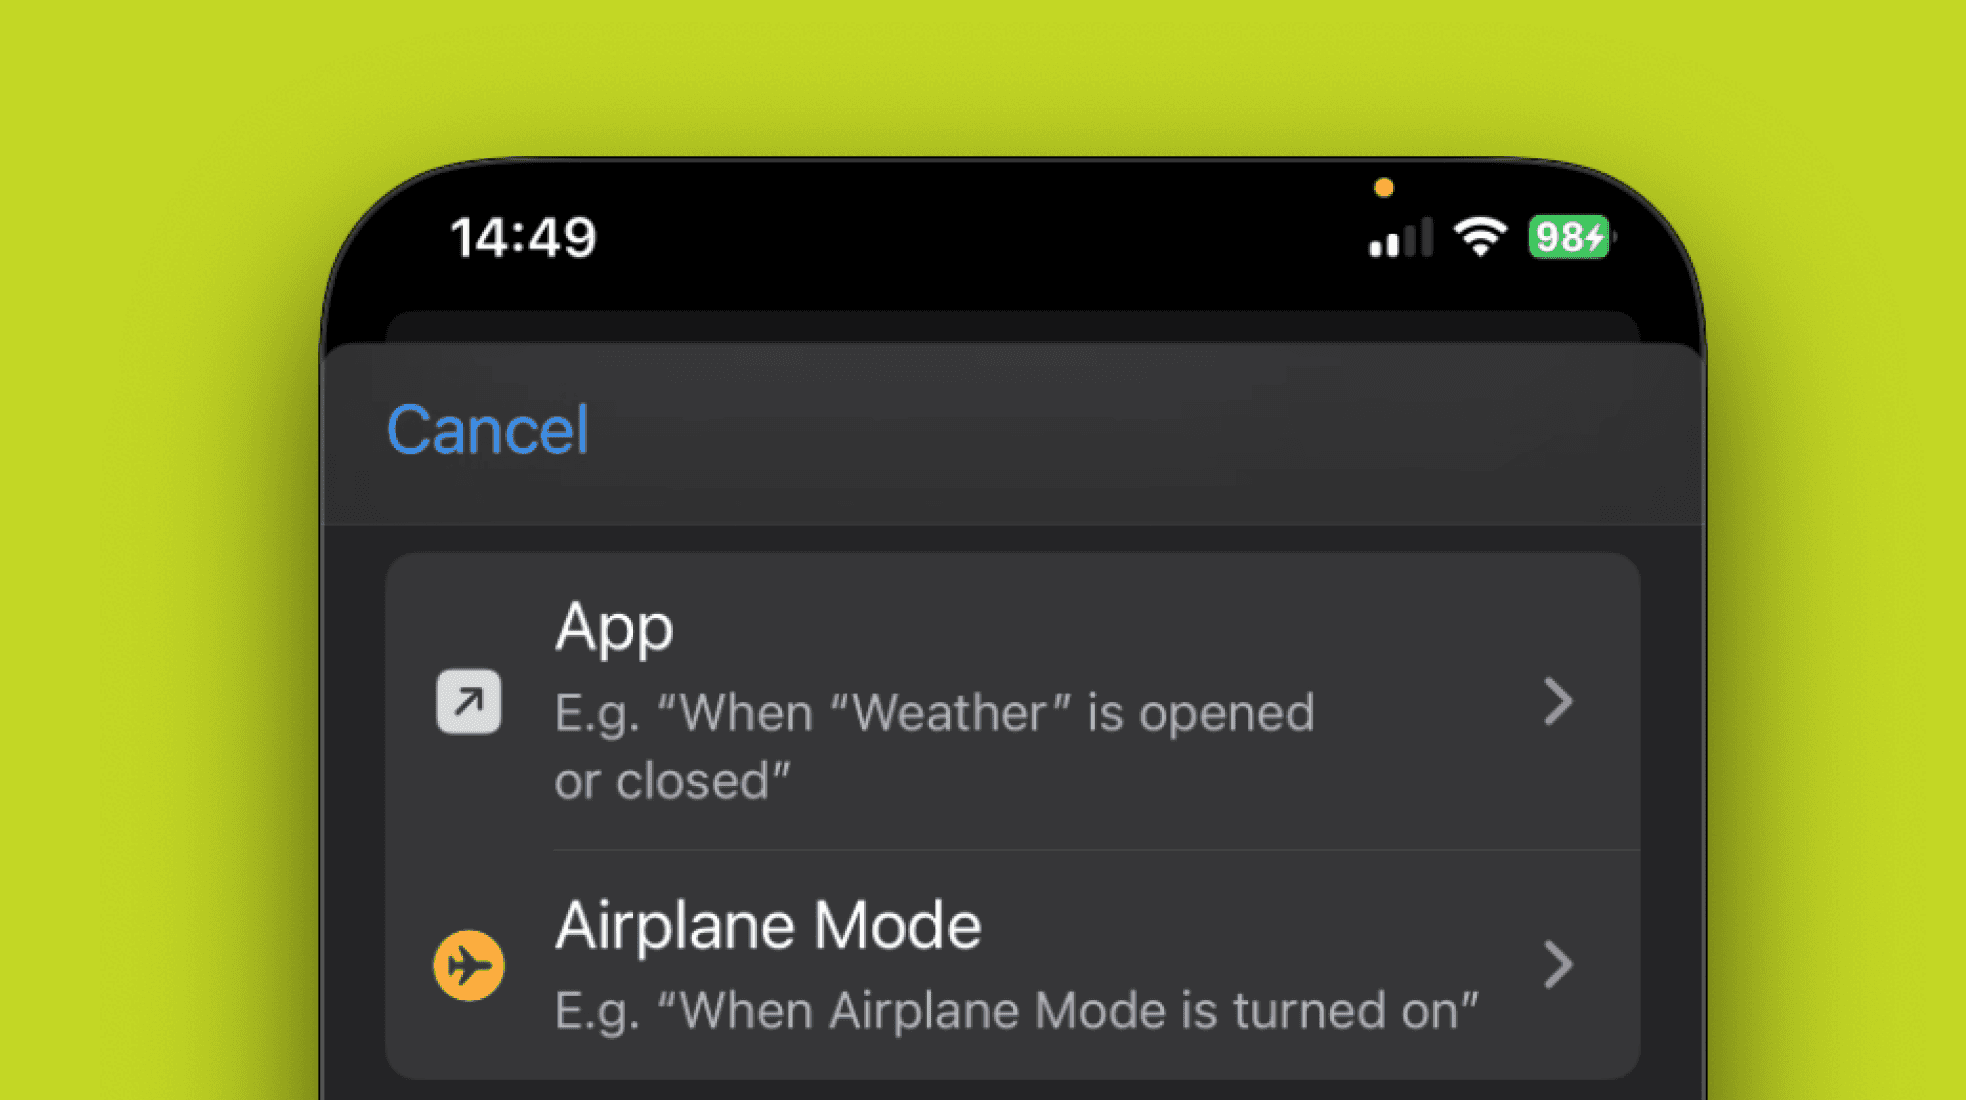
Step 2: Add a Menu Action
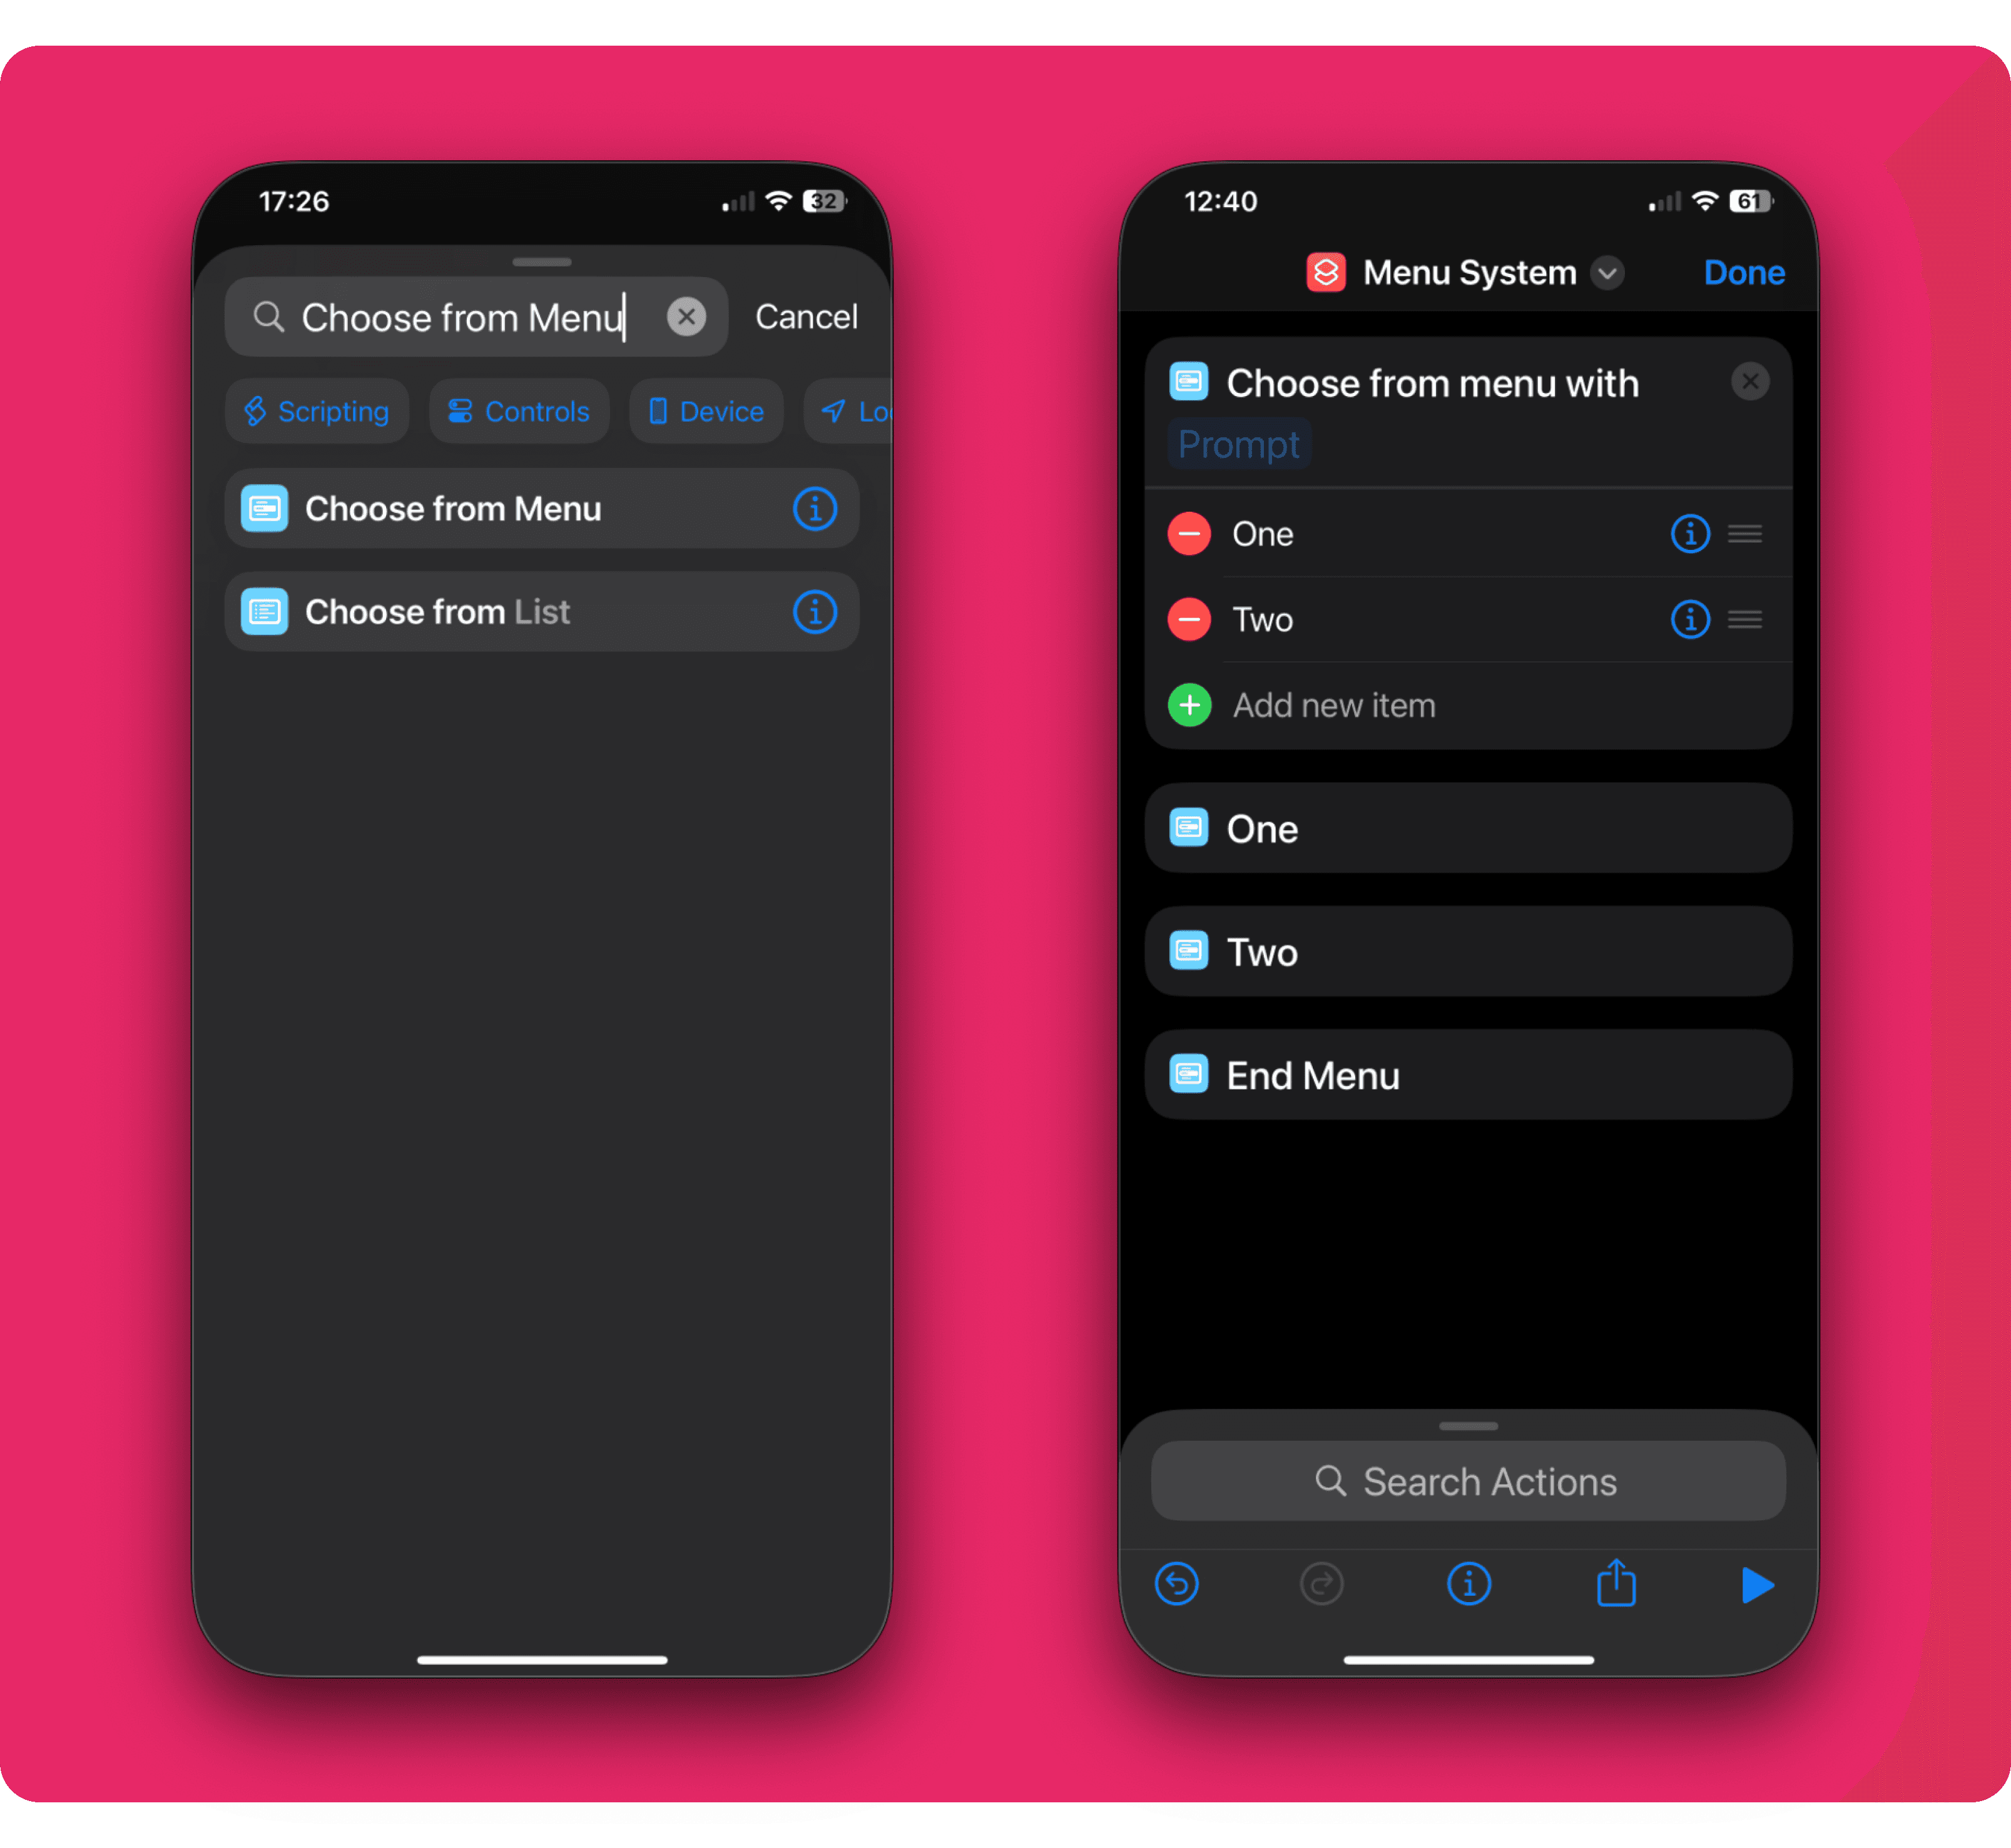
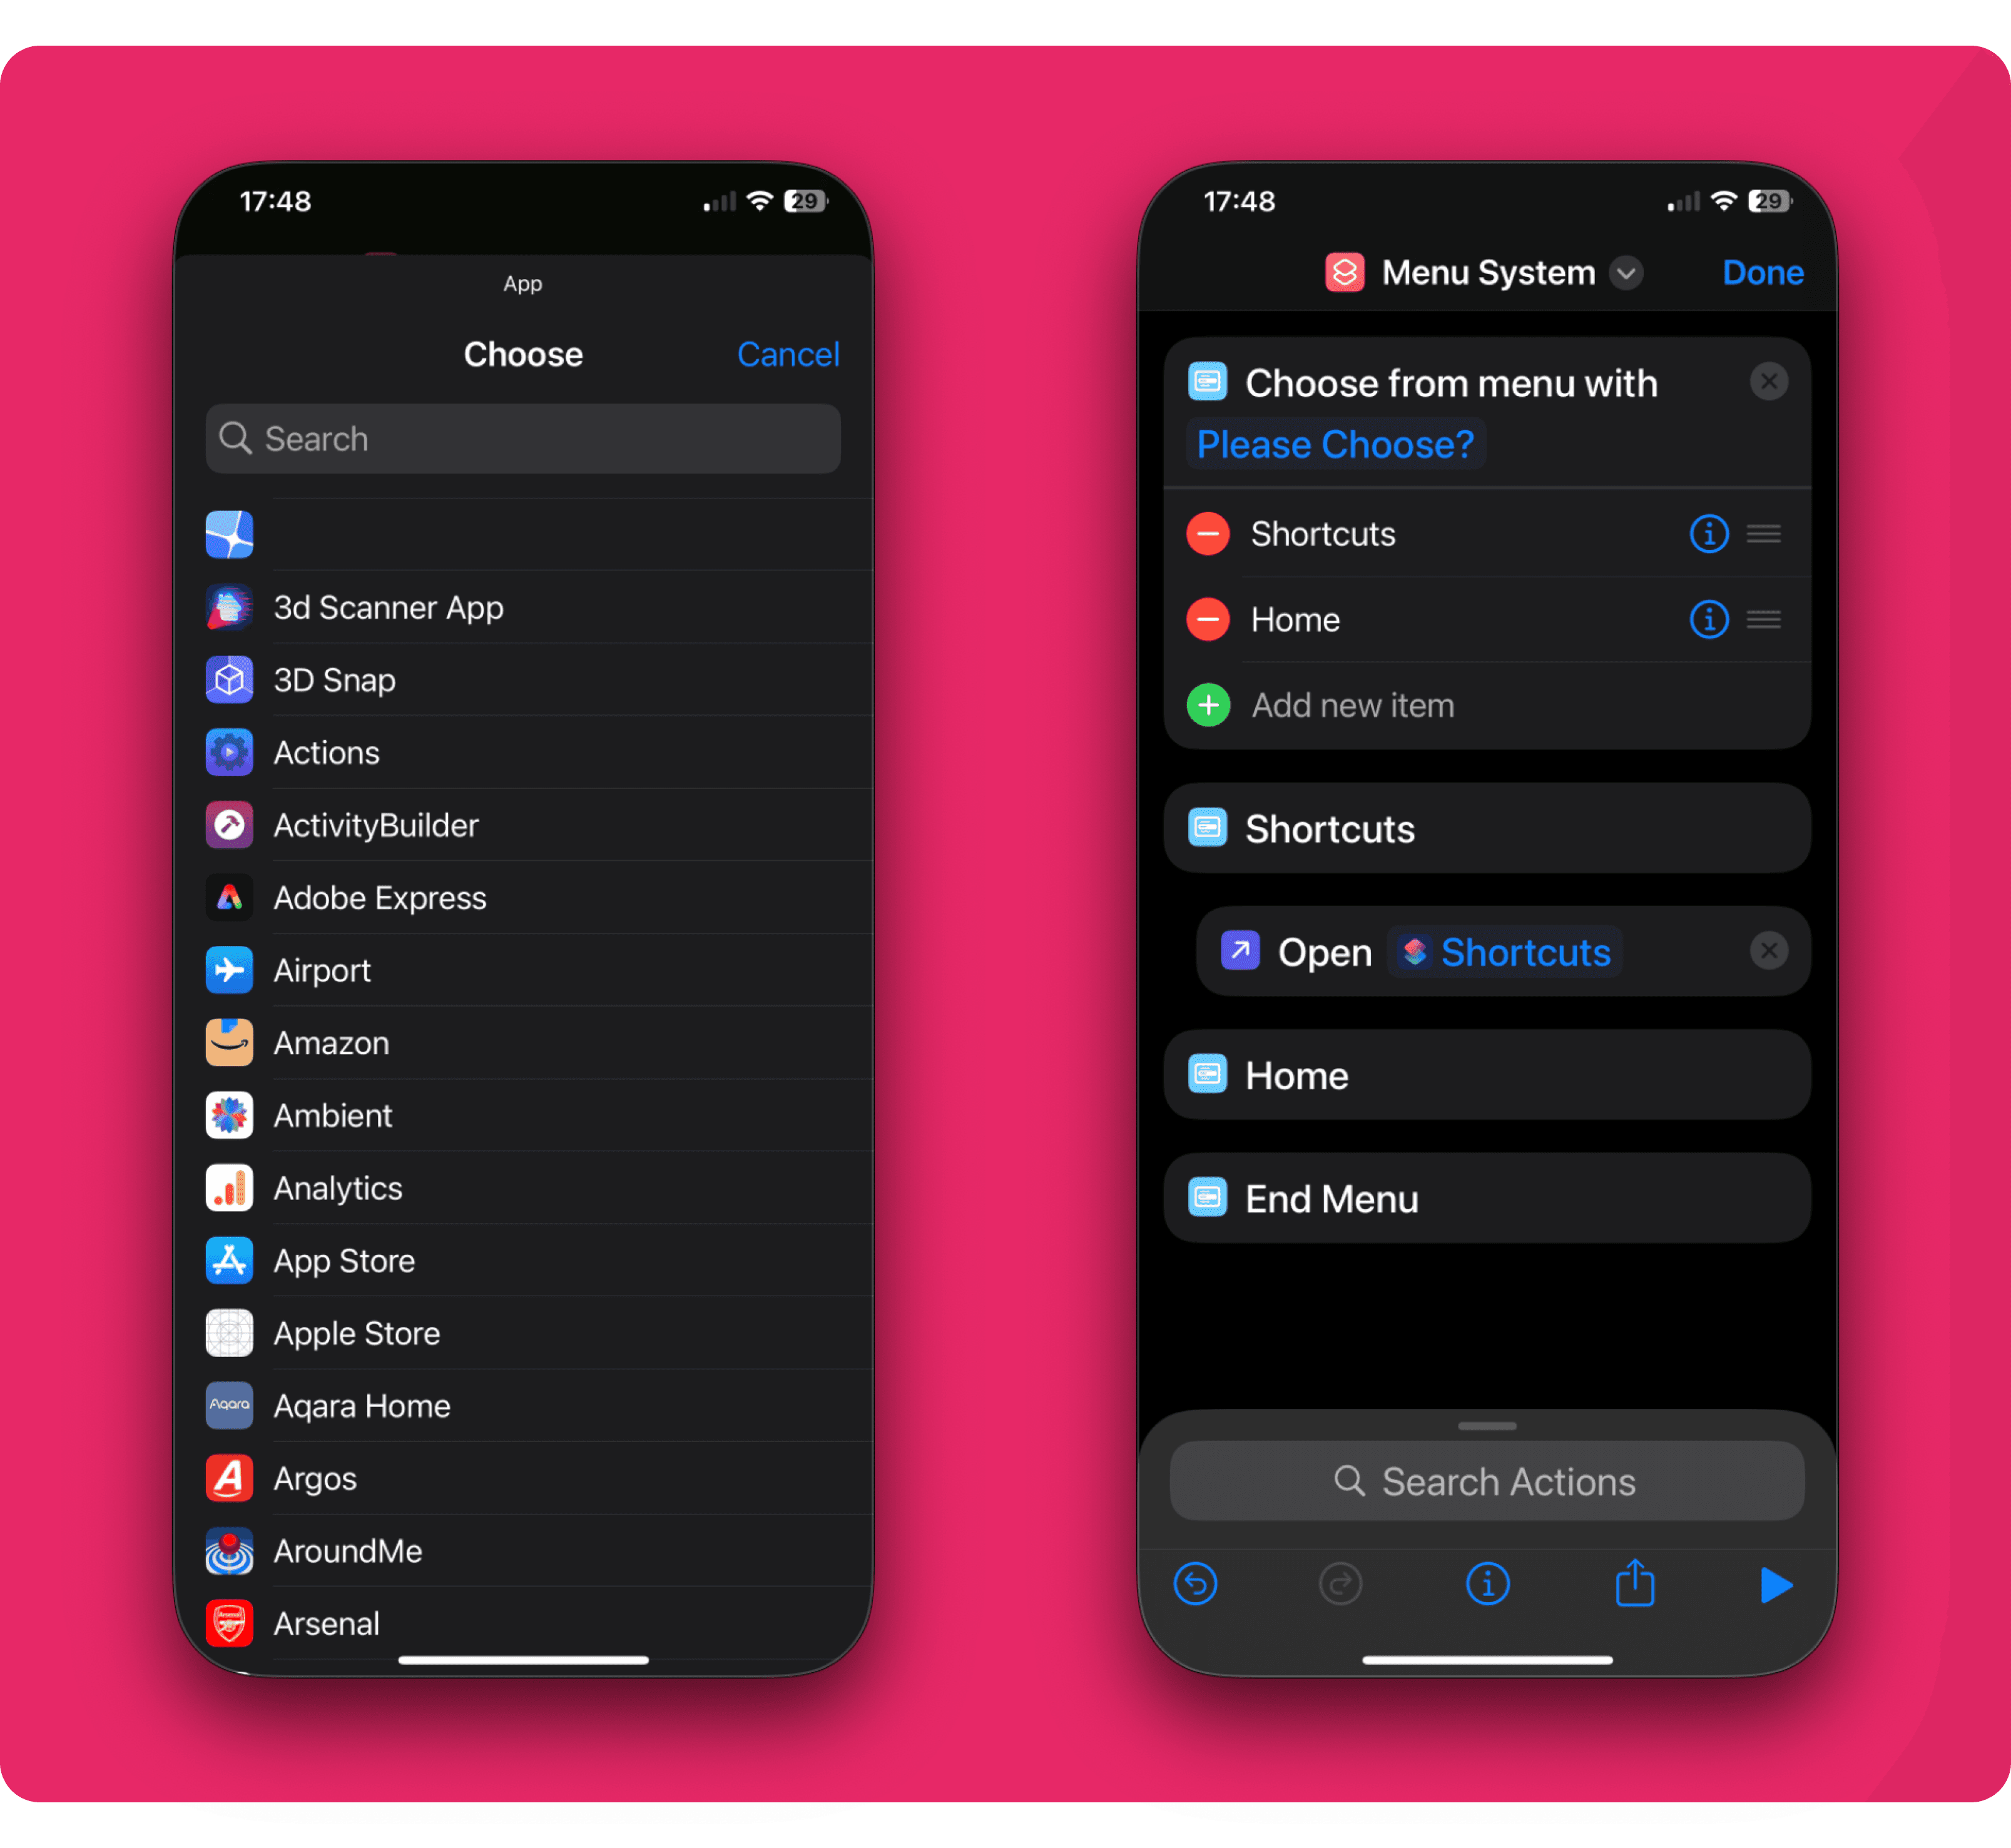
1. Search for and select Choose from Menu. This action will create a menu that displays multiple options for the user to choose from.

---
Step 3: Customise Menu Options
1. In the "Menu Items" section, tap Add New Item for each app or option you want to include. For example, you might add:
- "Open Shortcuts"
- "Open Home"
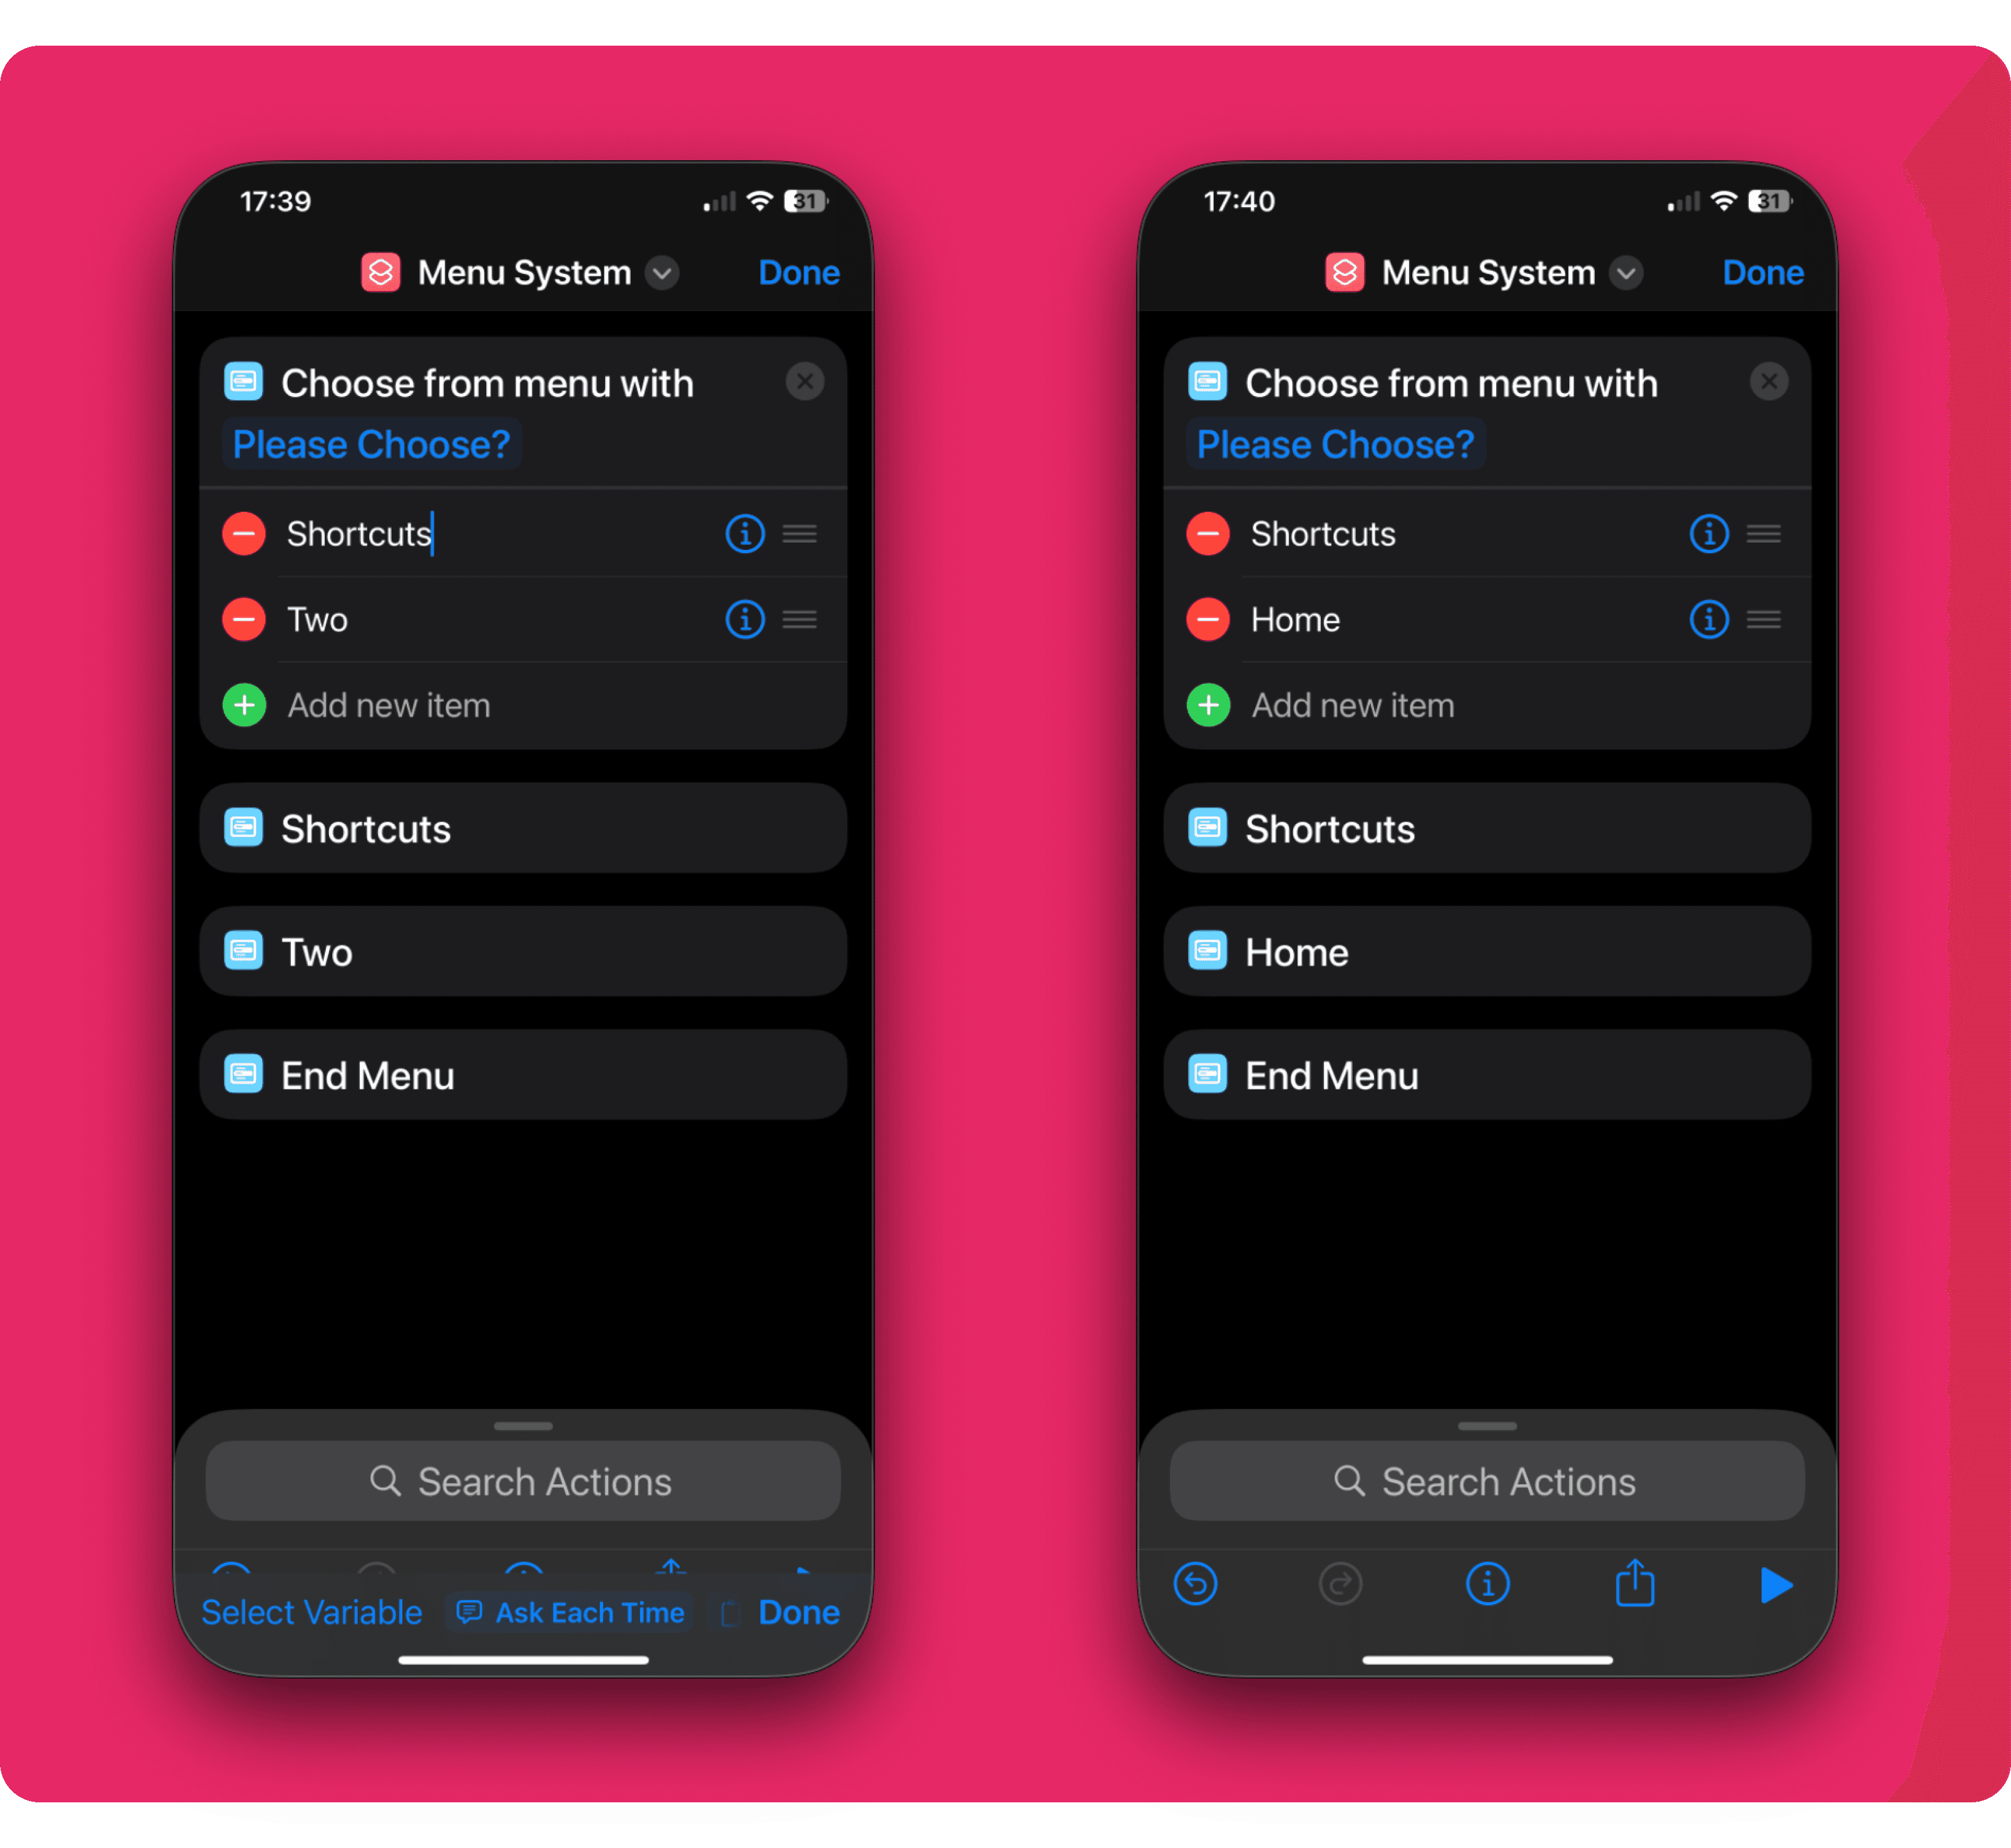
2. Rename the items to match the apps or tasks you’re setting up.
---
Step 4: Link Actions to Menu Options
For each menu item, define what happens when it’s selected:
1. Search for Open App.
2. Add the Open App action.
- When you add the Open App action I might appear at the bottom of the shortcut and not after the menu item, simply drag and place underneath the corresponding menu item.
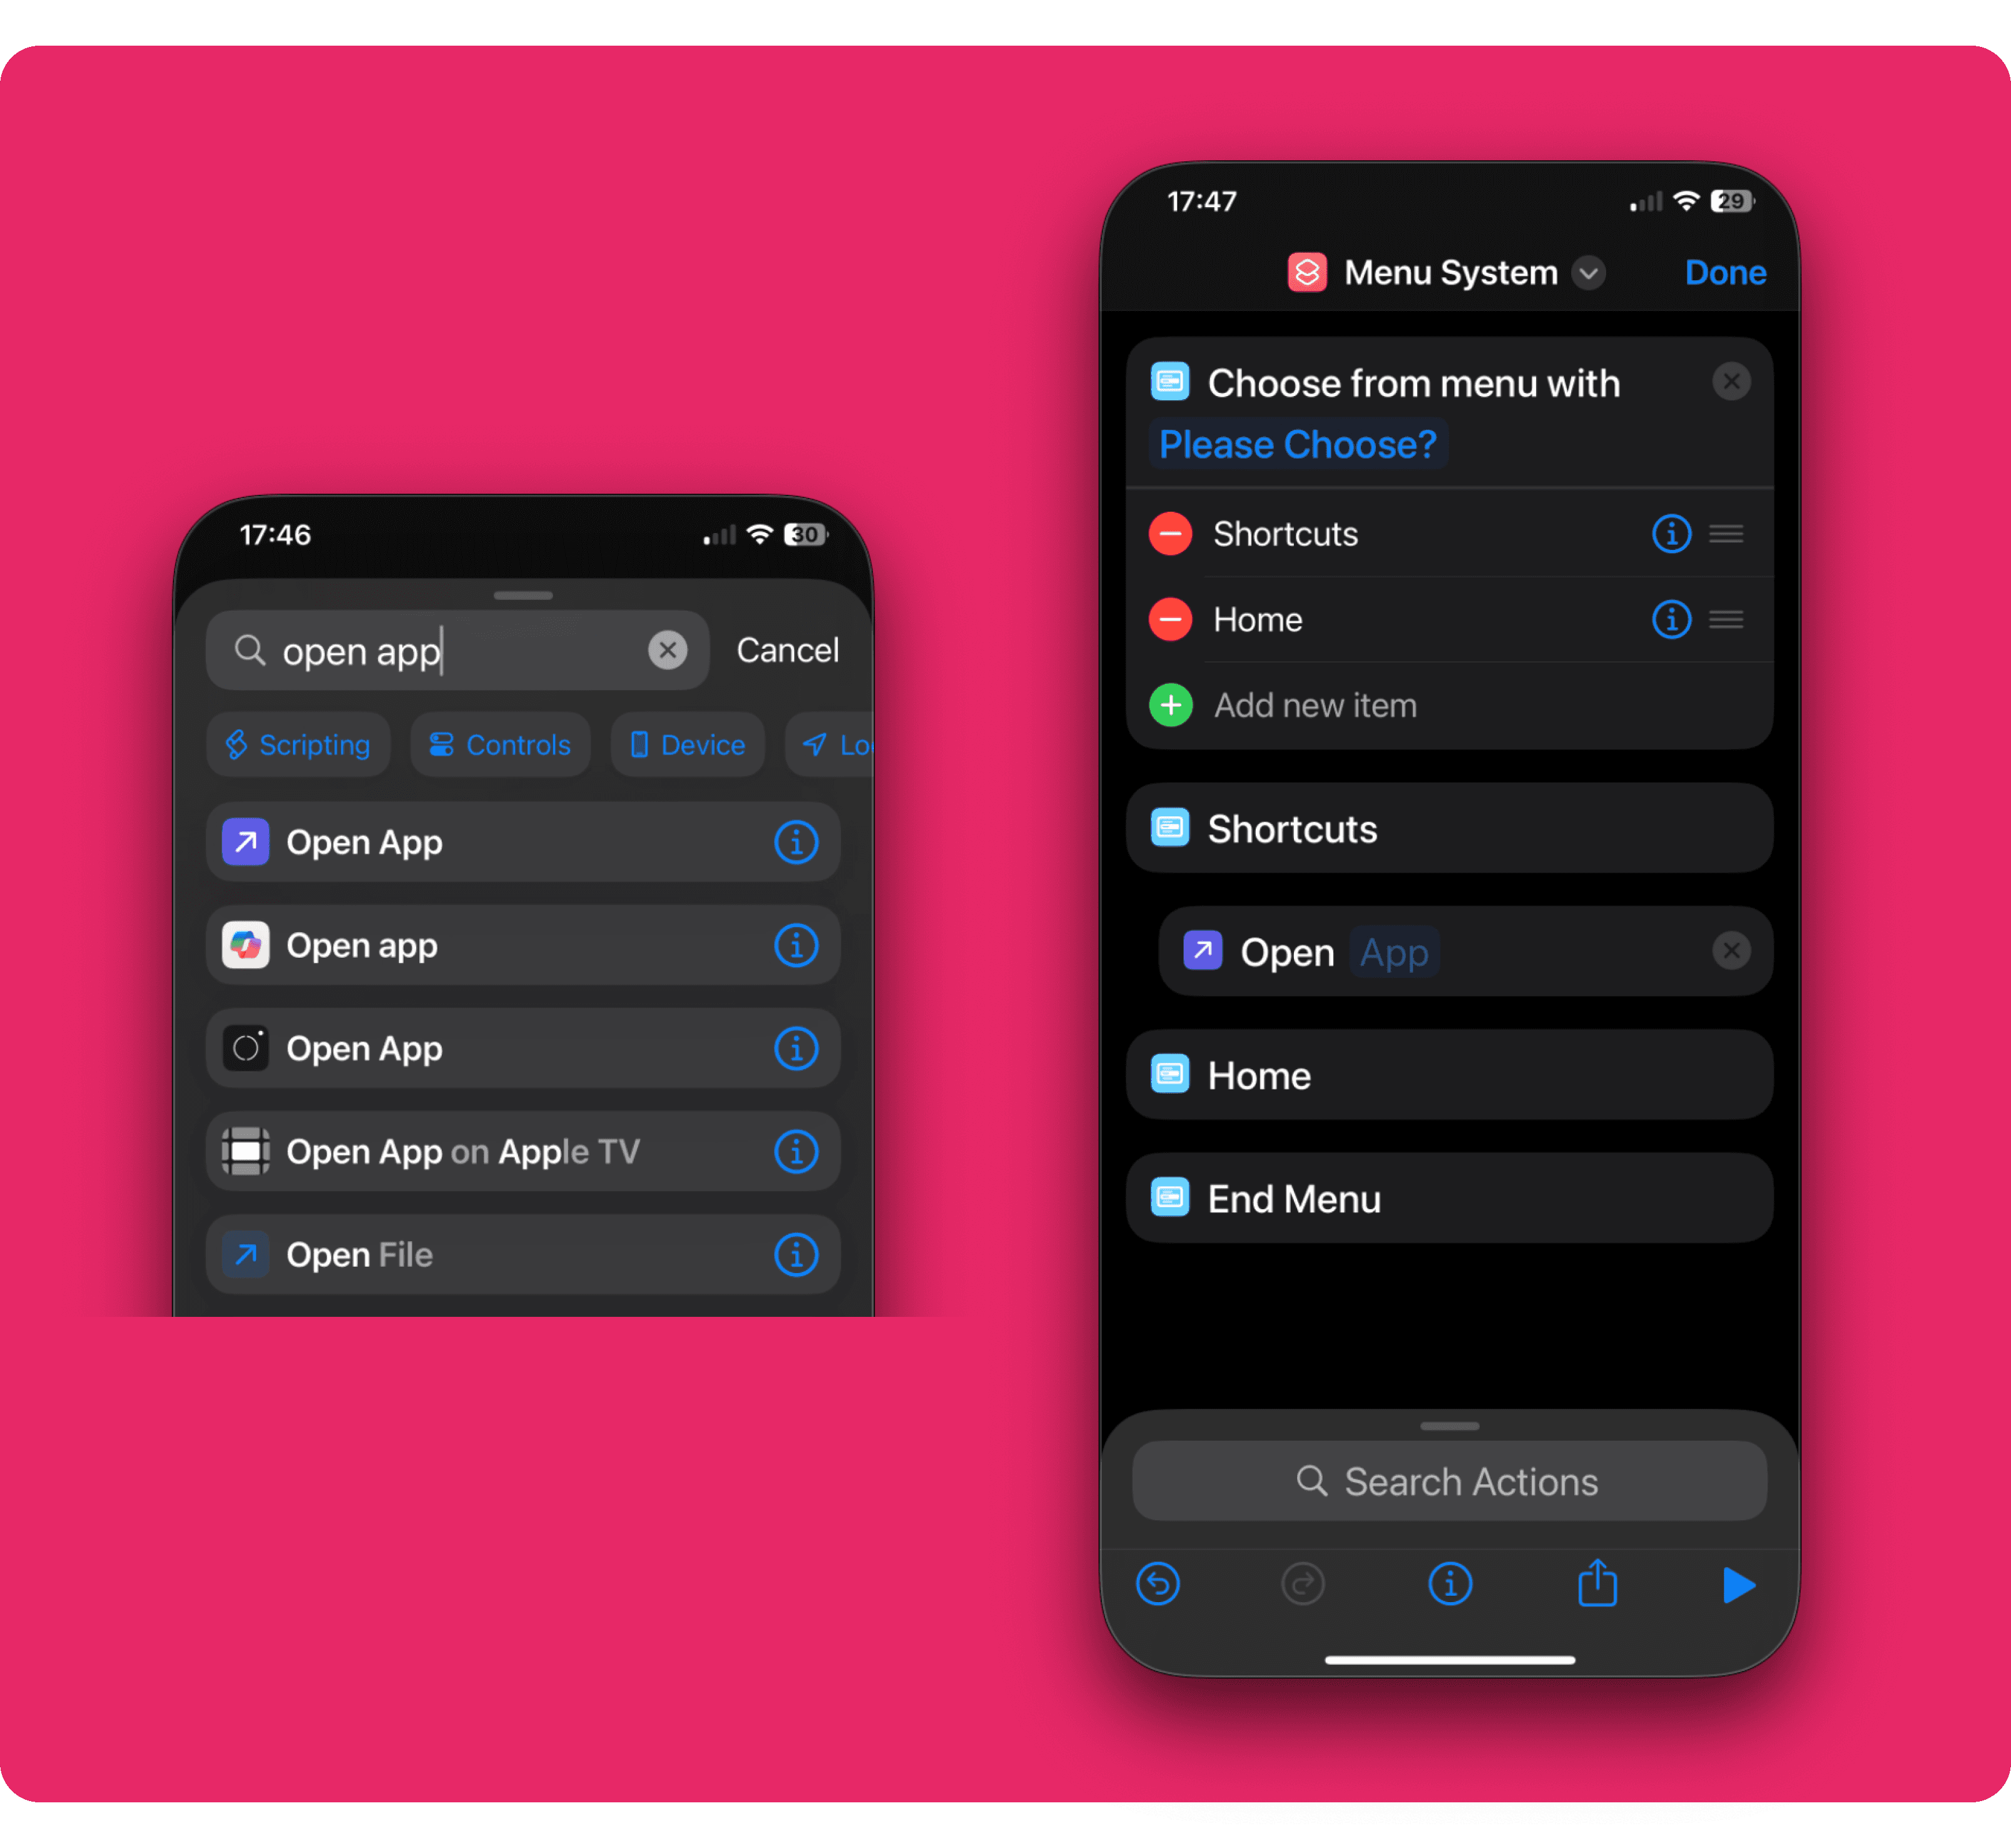
3. Tap "App" in the action and select the corresponding app from the list. For instance:
- For "Open Shortcuts," select Shortcuts.
- For "Open Home," select Home.
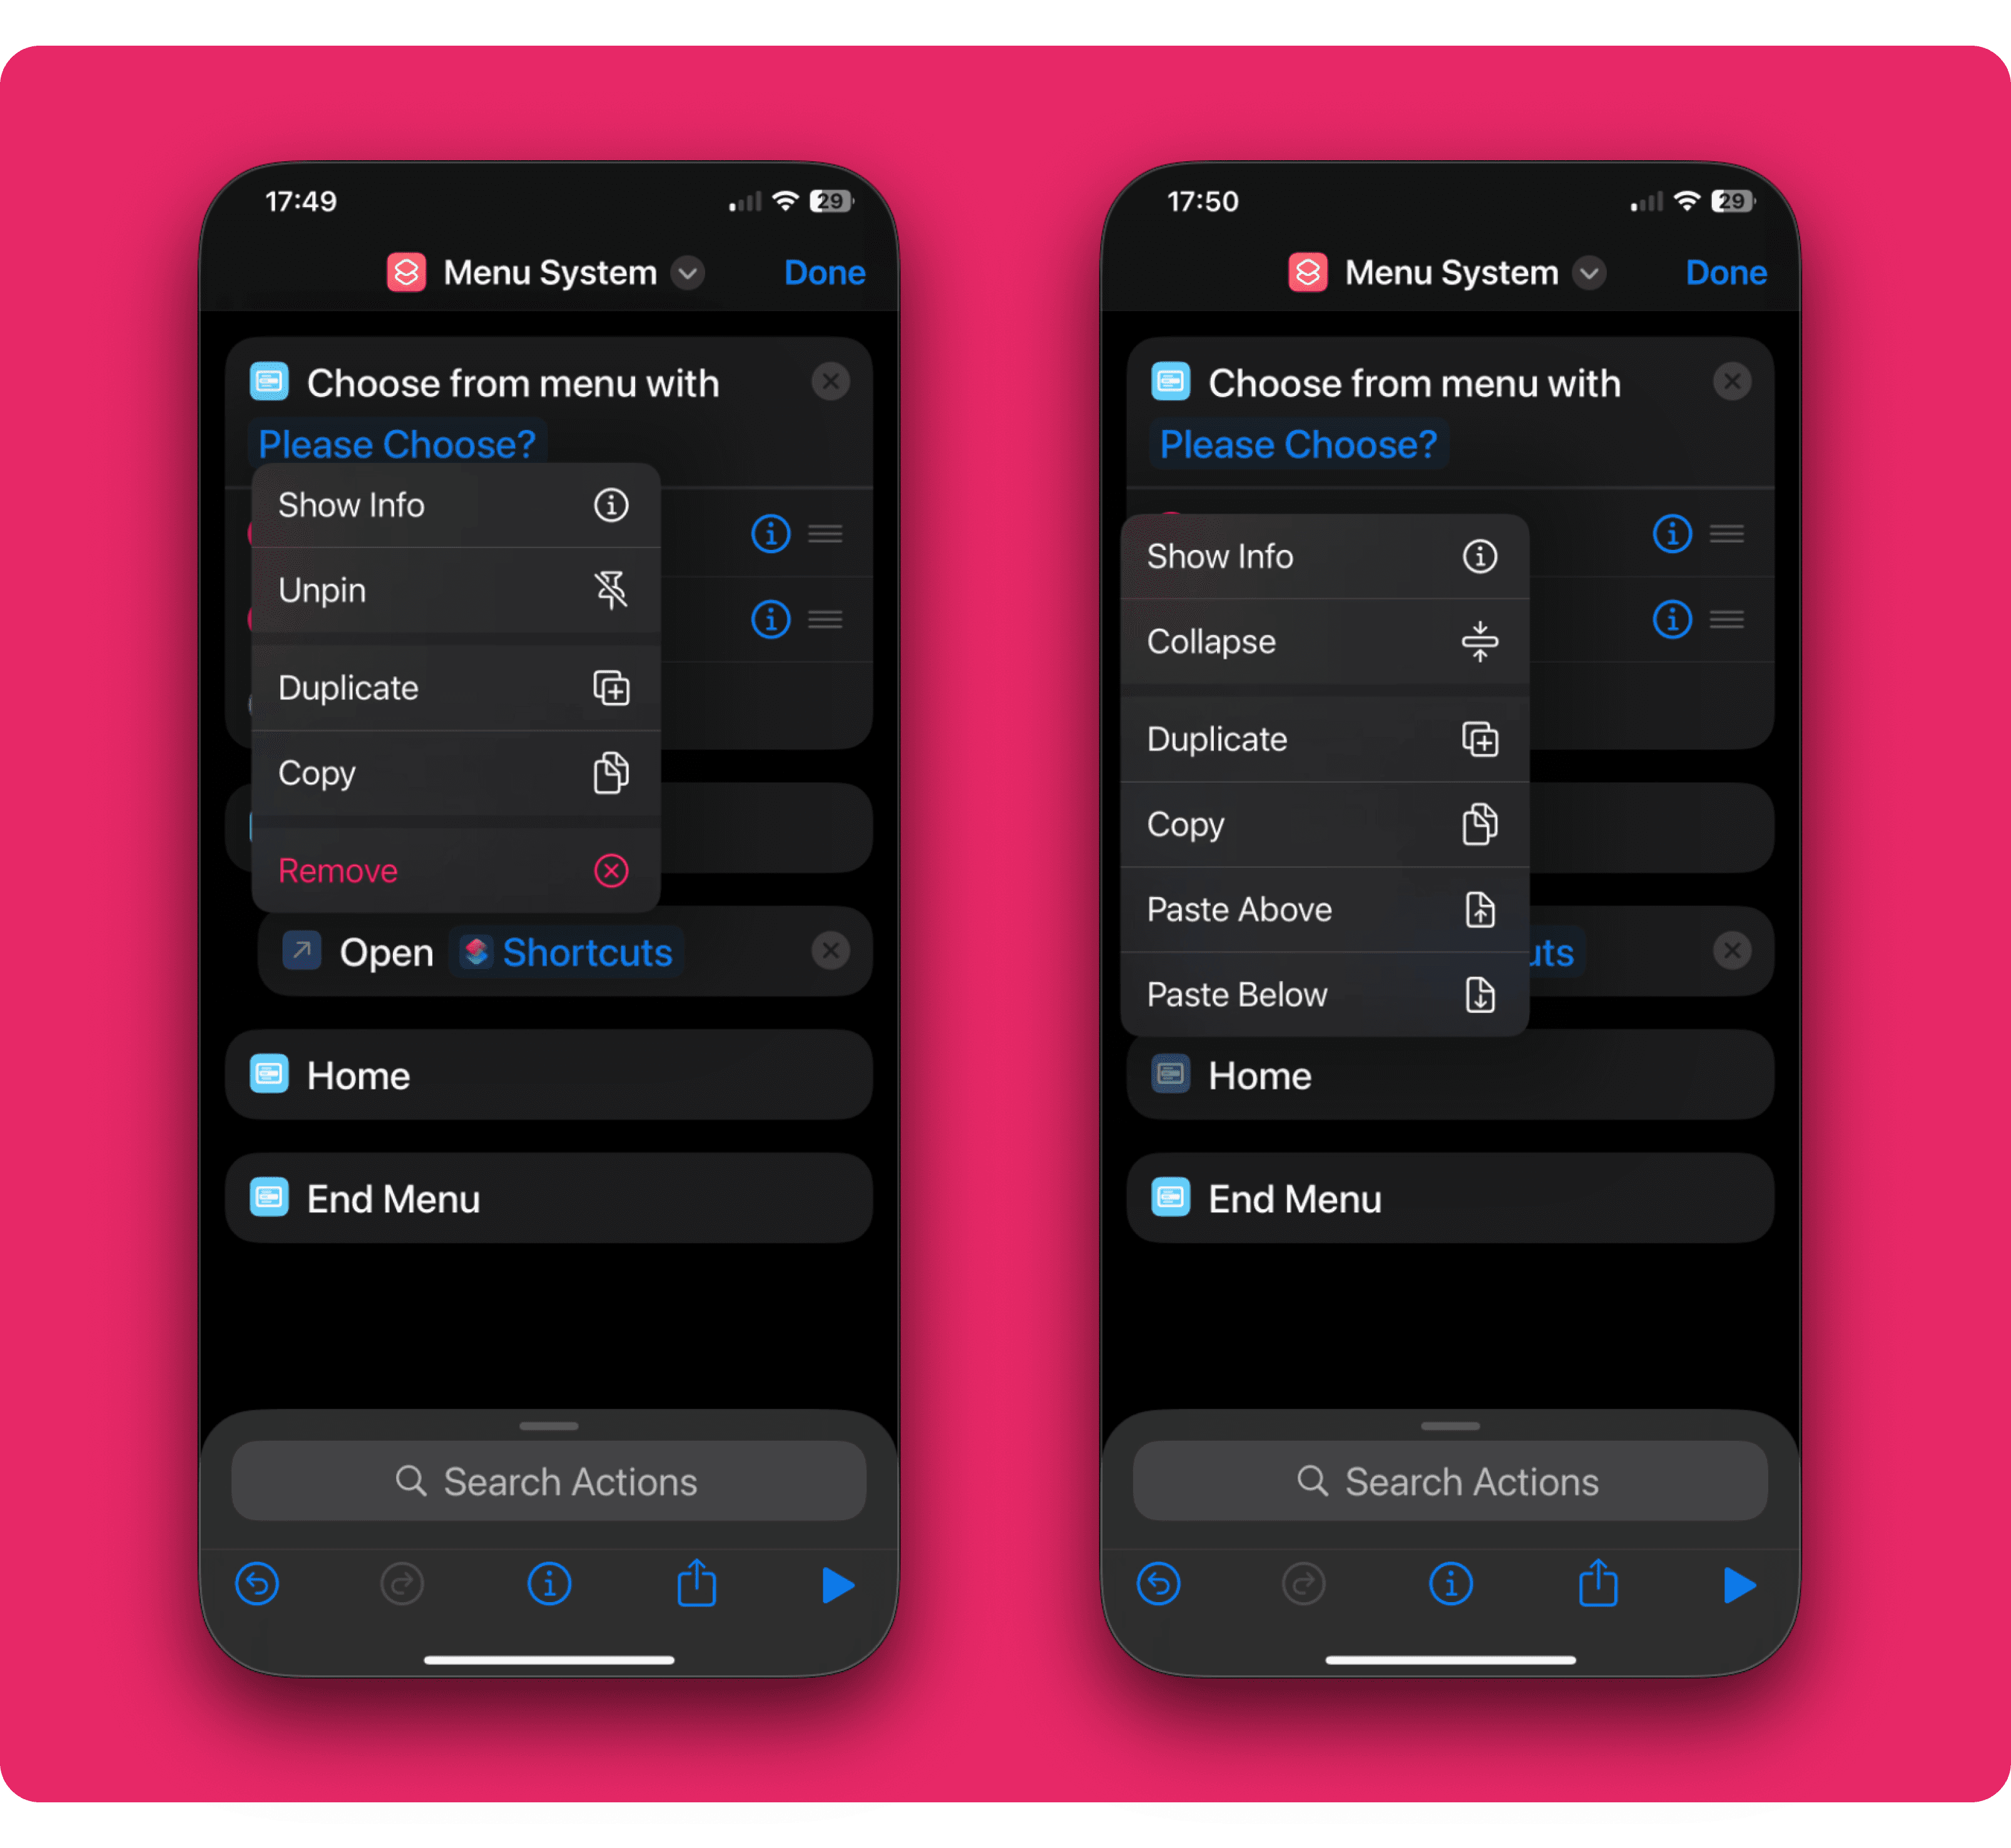
To make things easier, I usually just copy and paste actions. Press and hold the left edge of the action, and you’ll see a contextual menu with a few options. Pick Copy. Then, on the menu item you want the action to be applied to again, select the left edge, and from the contextual menu options, choose Paste Below.
N.B. Whilst there isn’t a maximum of menu options, you will need to consider the screen size of your device.
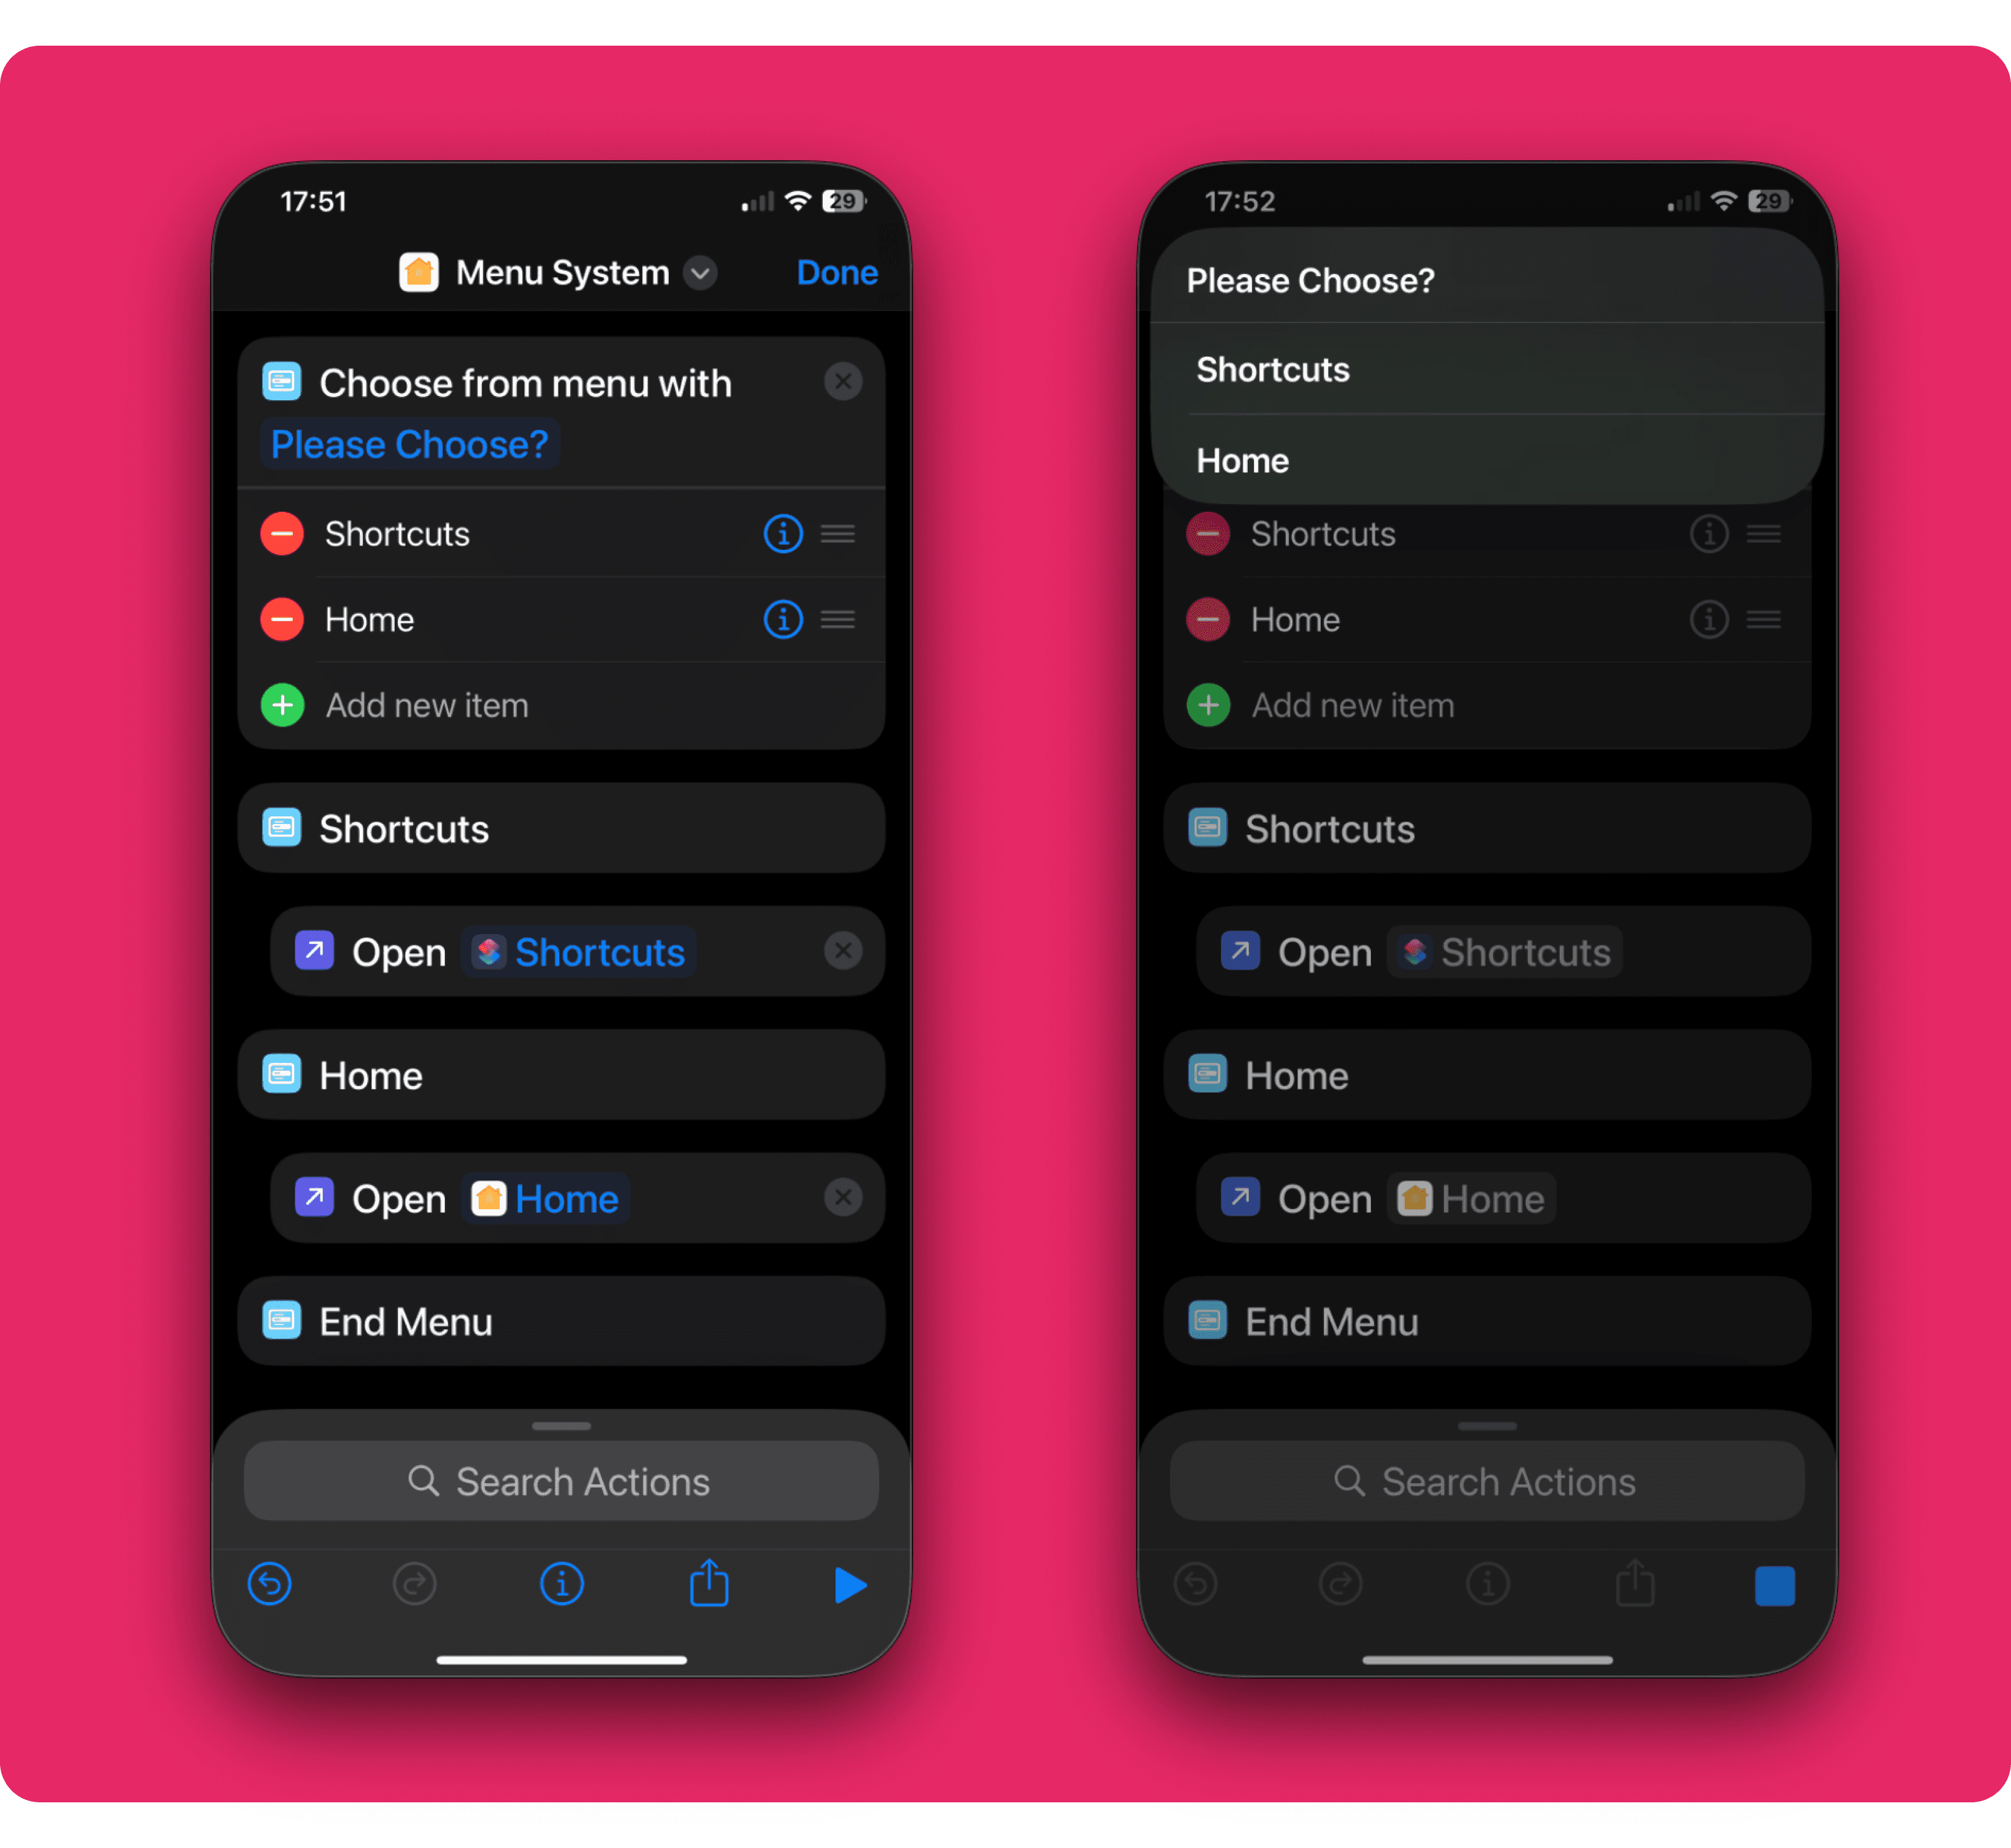
Repeat this process for all menu options as required.
---
Step 5: Test Your Shortcut
1. Tap the Play button (a triangle icon) in the bottom-right corner to test the shortcut.
2. When the menu appears, select an option to ensure the correct app opens.
If anything isn’t working as expected, double-check that the actions are linked to the right menu items.
---
Step 6: Add a Name and Icon
1. Tap the Settings icon (three sliders) at the top of the screen.
2. Give your shortcut a name, such as “Menu System” - I’m confident you’ll come up with a better name than I did.
3. Tap Add to Home Screen to create a Home Screen icon for the shortcut. You can even customise the icon with an image or colour.
---
Step 7: Save and Use
Once saved, your shortcut is ready to use. Tap the shortcut’s icon on your Home Screen (or run it from the Shortcuts app) to display the menu. Select an option, and the corresponding app will open.
---
Ideas for Customisation
Themed Menus: Create separate shortcuts for themes like Work, Entertainment, or Social Media.
Nested Menus: Add another "Choose from Menu" action within one of the options for subcategories.
Advanced Automations: Combine this menu with actions like sending a message, setting reminders, or launching URLs for added functionality.
Run another shortcut: Instead of using Open App, replace with Run Shortcut.
---
Conclusion
A menu-based shortcut is a simple yet effective way to organise and access your favourite apps with minimal effort. While Apple’s features like folders and widgets have helped users manage their devices, they can sometimes add to the clutter. A menu-based shortcut offers a cleaner, more streamlined alternative. With a bit of creativity, you can transform your iPhone into a tailored productivity powerhouse. Try creating one today and enjoy the convenience it brings to your daily routine!
Expanding menu shortcut.
As I mentioned before, there are a bunch of cool things you can add to the menu-based shortcuts. Instead of adding the Open App shortcut, why not try adding another Choose From Menu? This way, you can expand the shortcut without having to worry about the screen size, especially on an iPhone.
Let’s go through the expanded shortcut together.
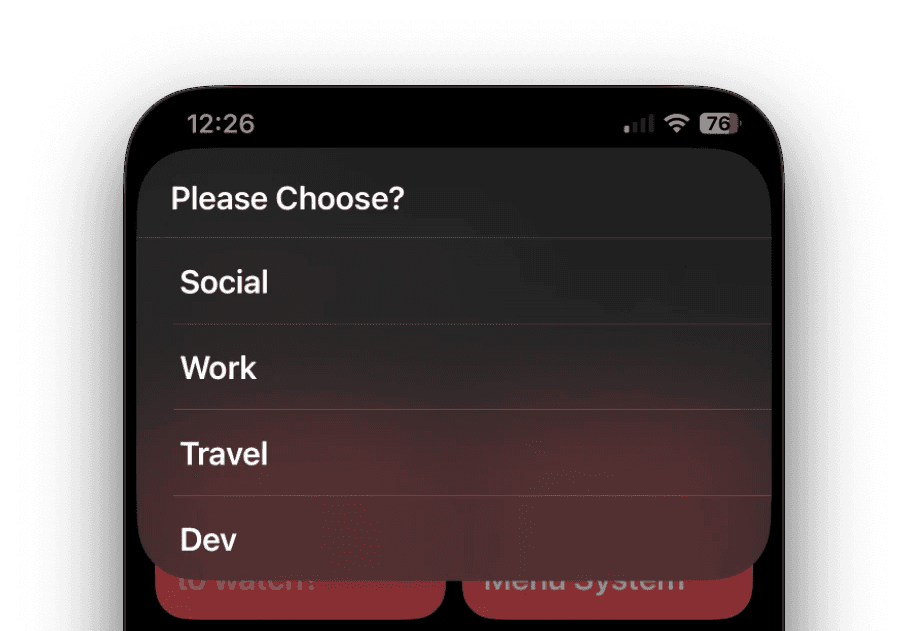
In the Choose From Menu, I’d suggest changing the menu items from the names of apps to the categories they belong to.
For this tutorial, I’ve created a menu with four categories: Social, Work, Travel, and Dev. Once you’ve set this up, let’s add a Choose From Menu underneath each menu item. You can copy and paste the first Choose From Menu from this shortcut, but remember to remove the copied menu items. After that, your shortcut should look like this:
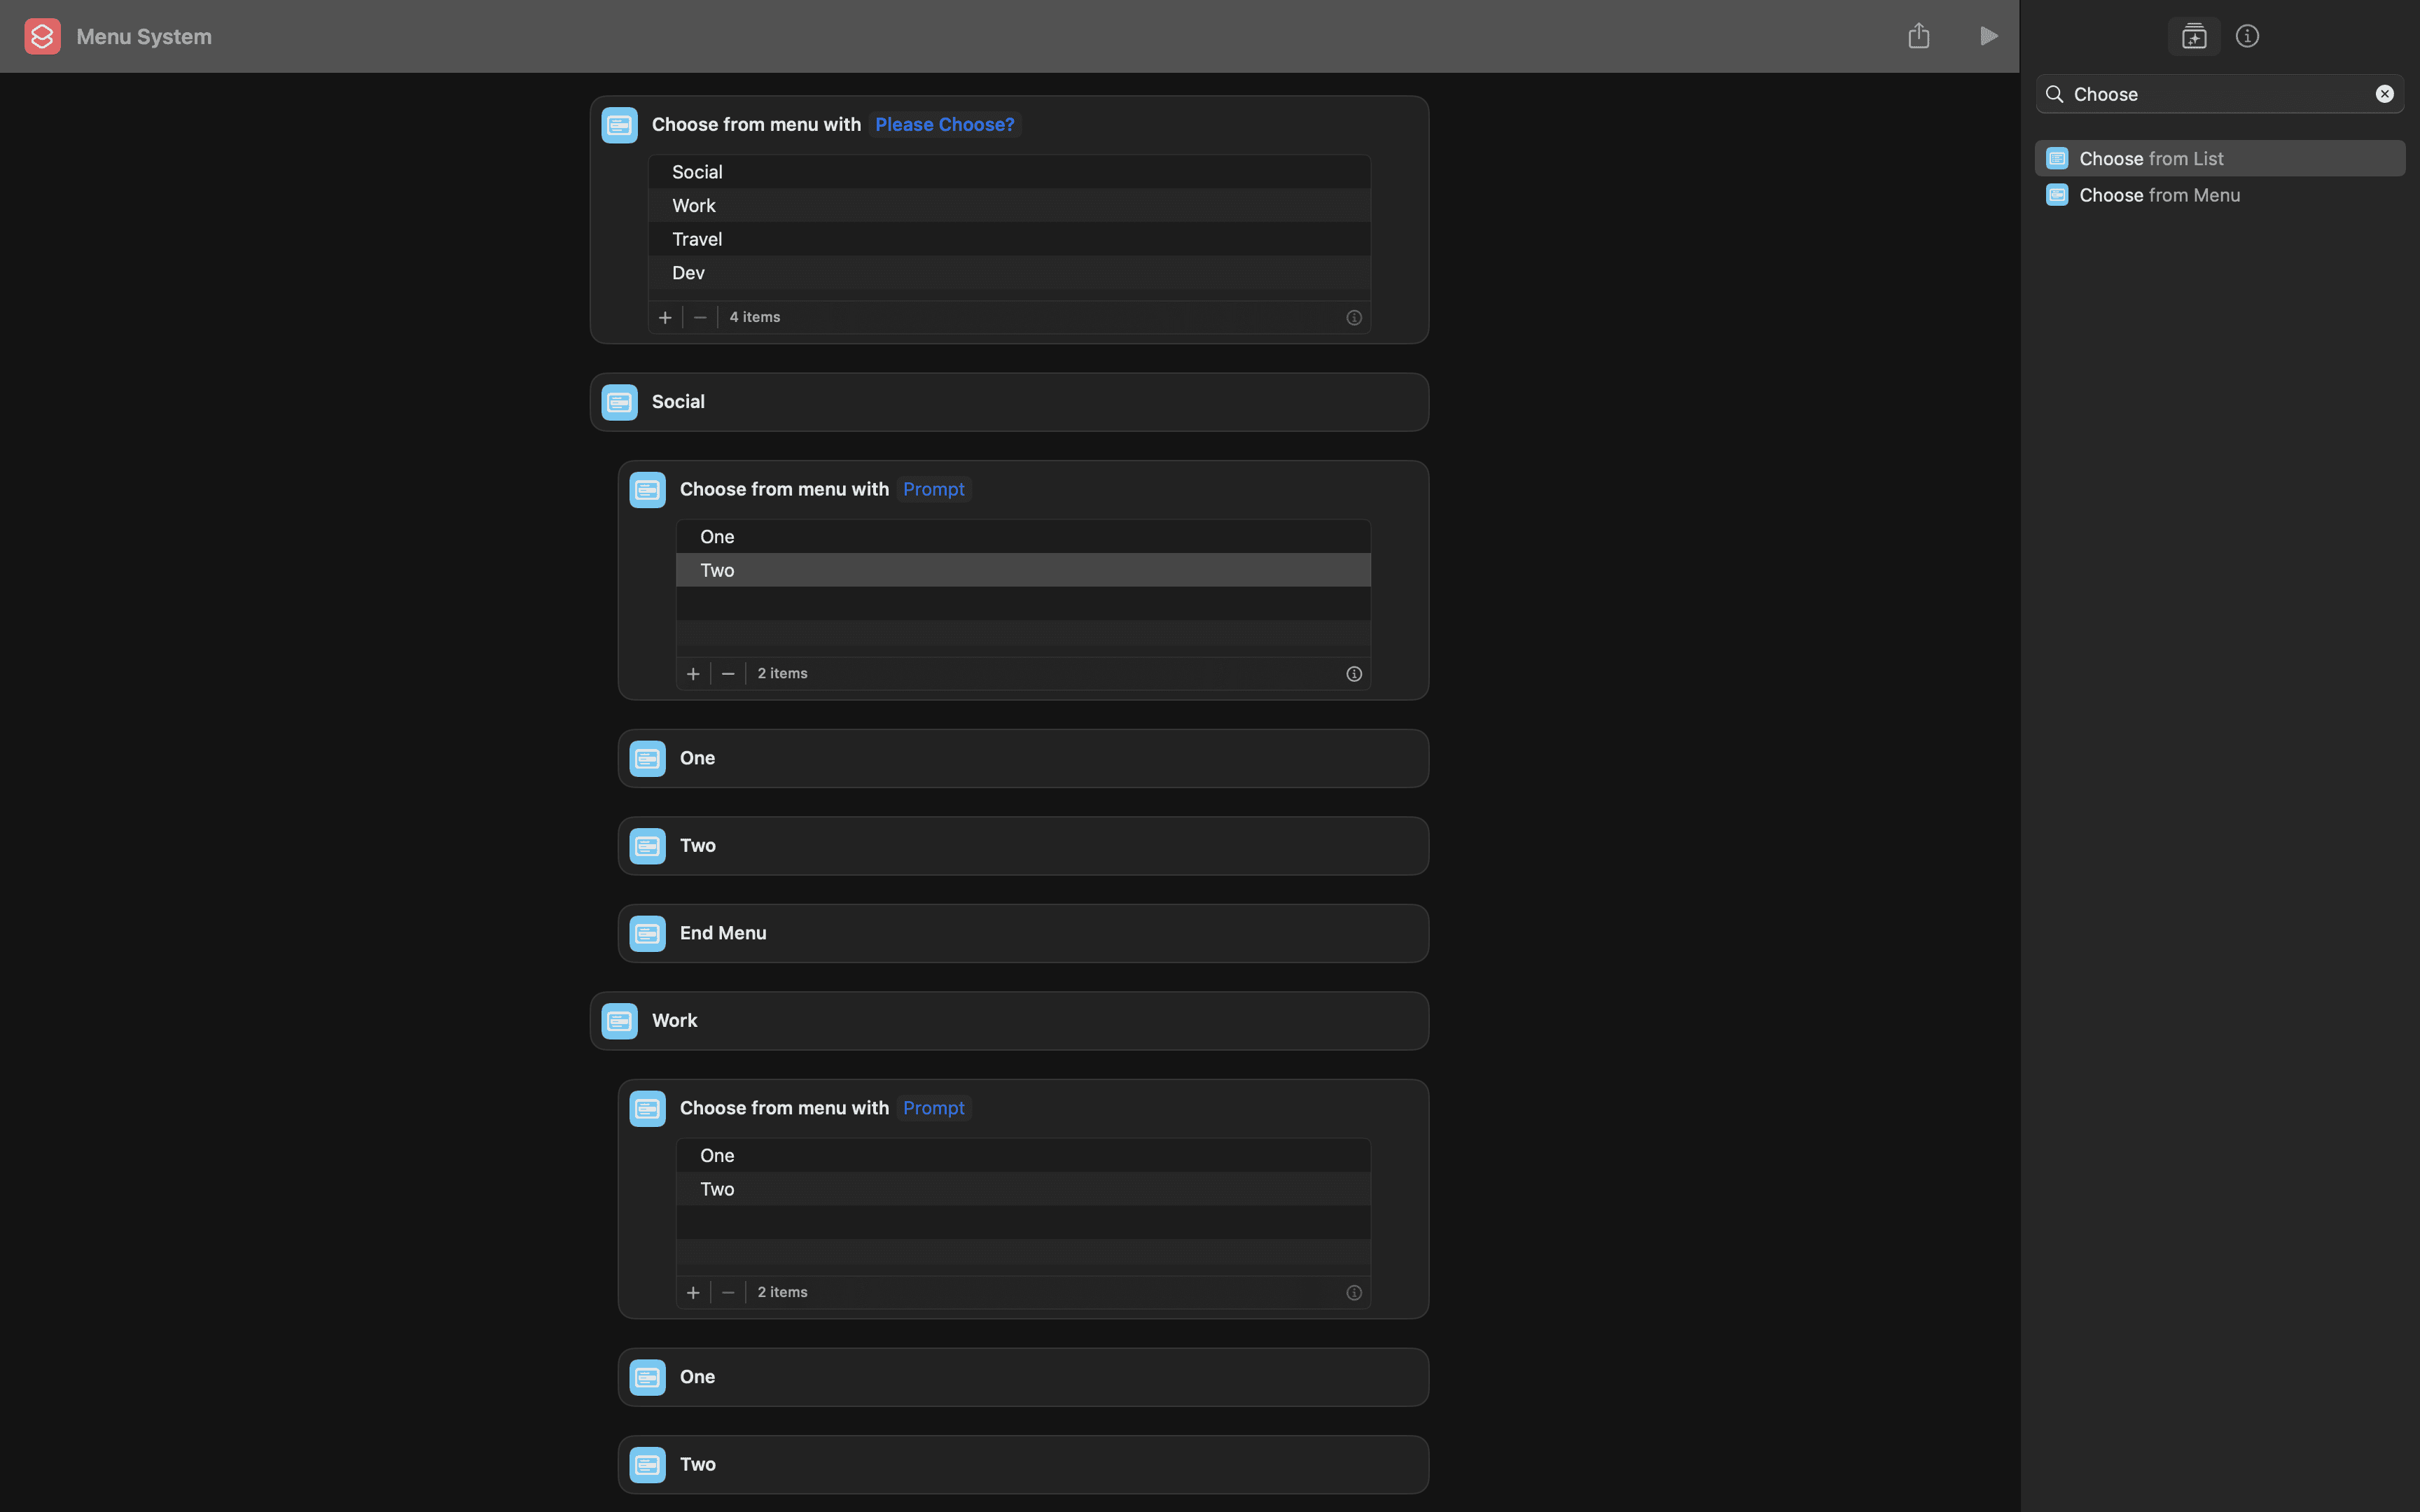
Now, let’s populate the Menu Items. For the Social menu item, I’ve added X, BlueSky, Instagram, and TikTok.
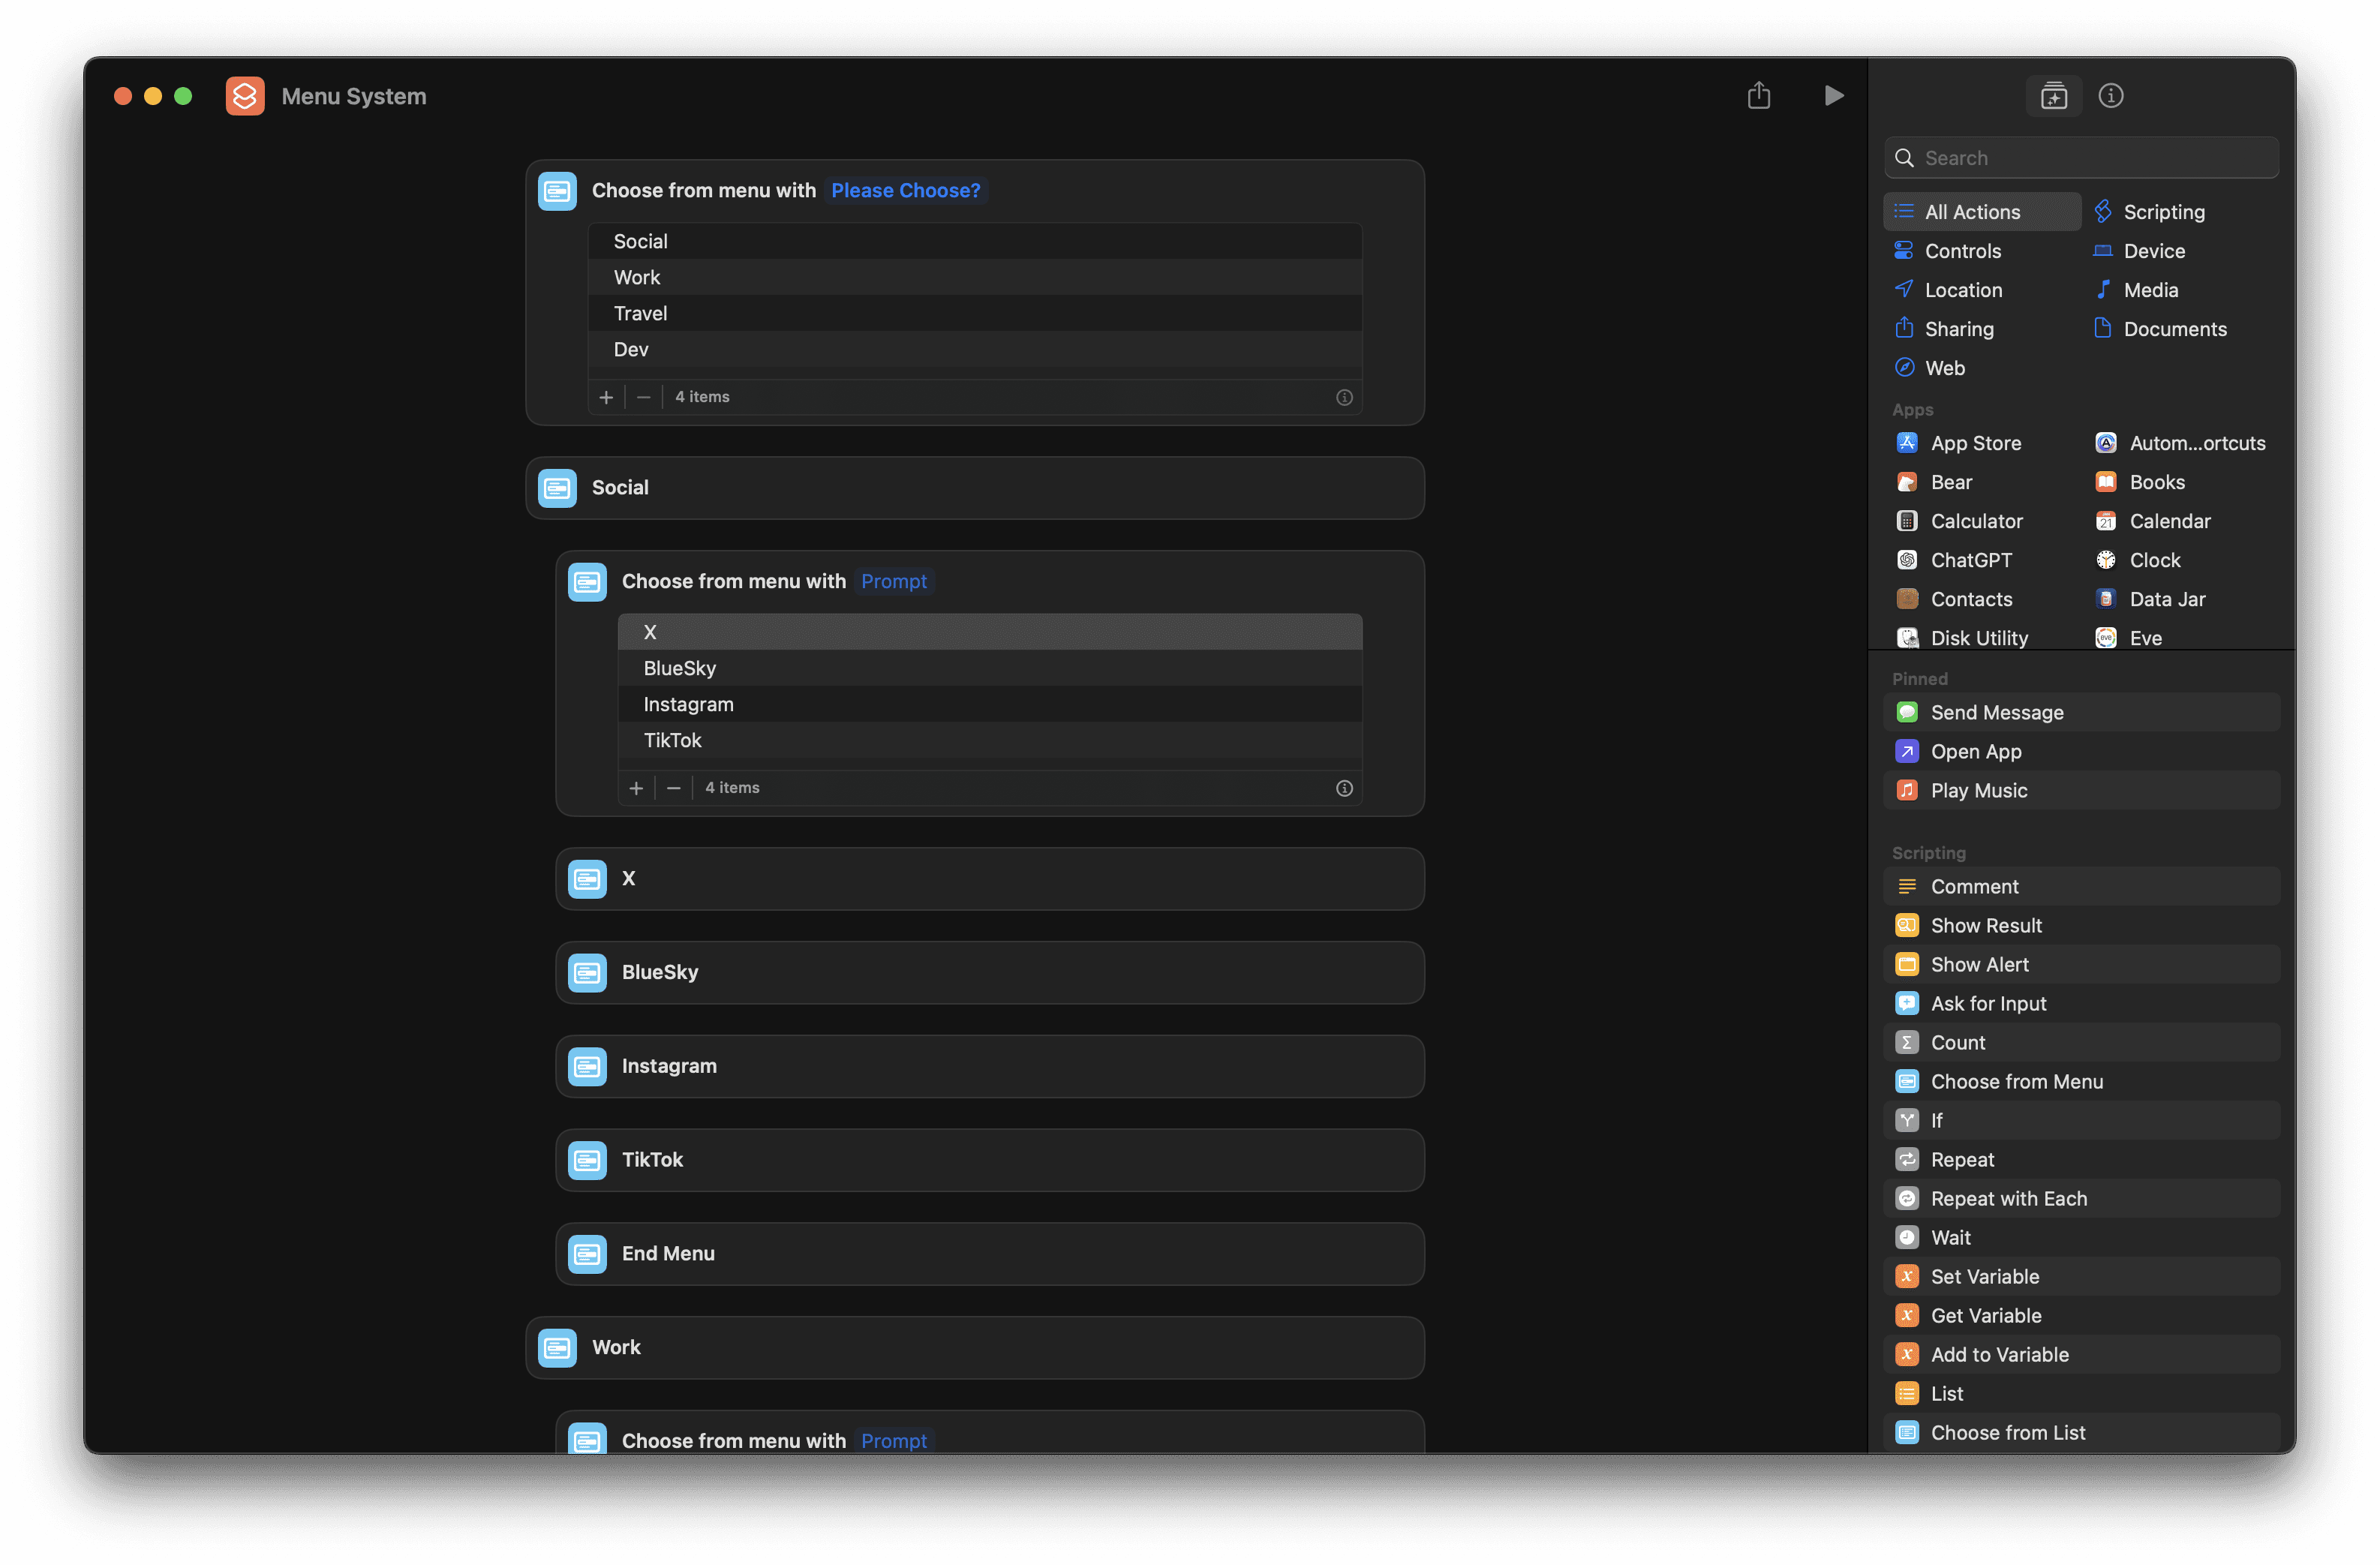
Once you’re done, let’s add the Open App action to each menu item output.
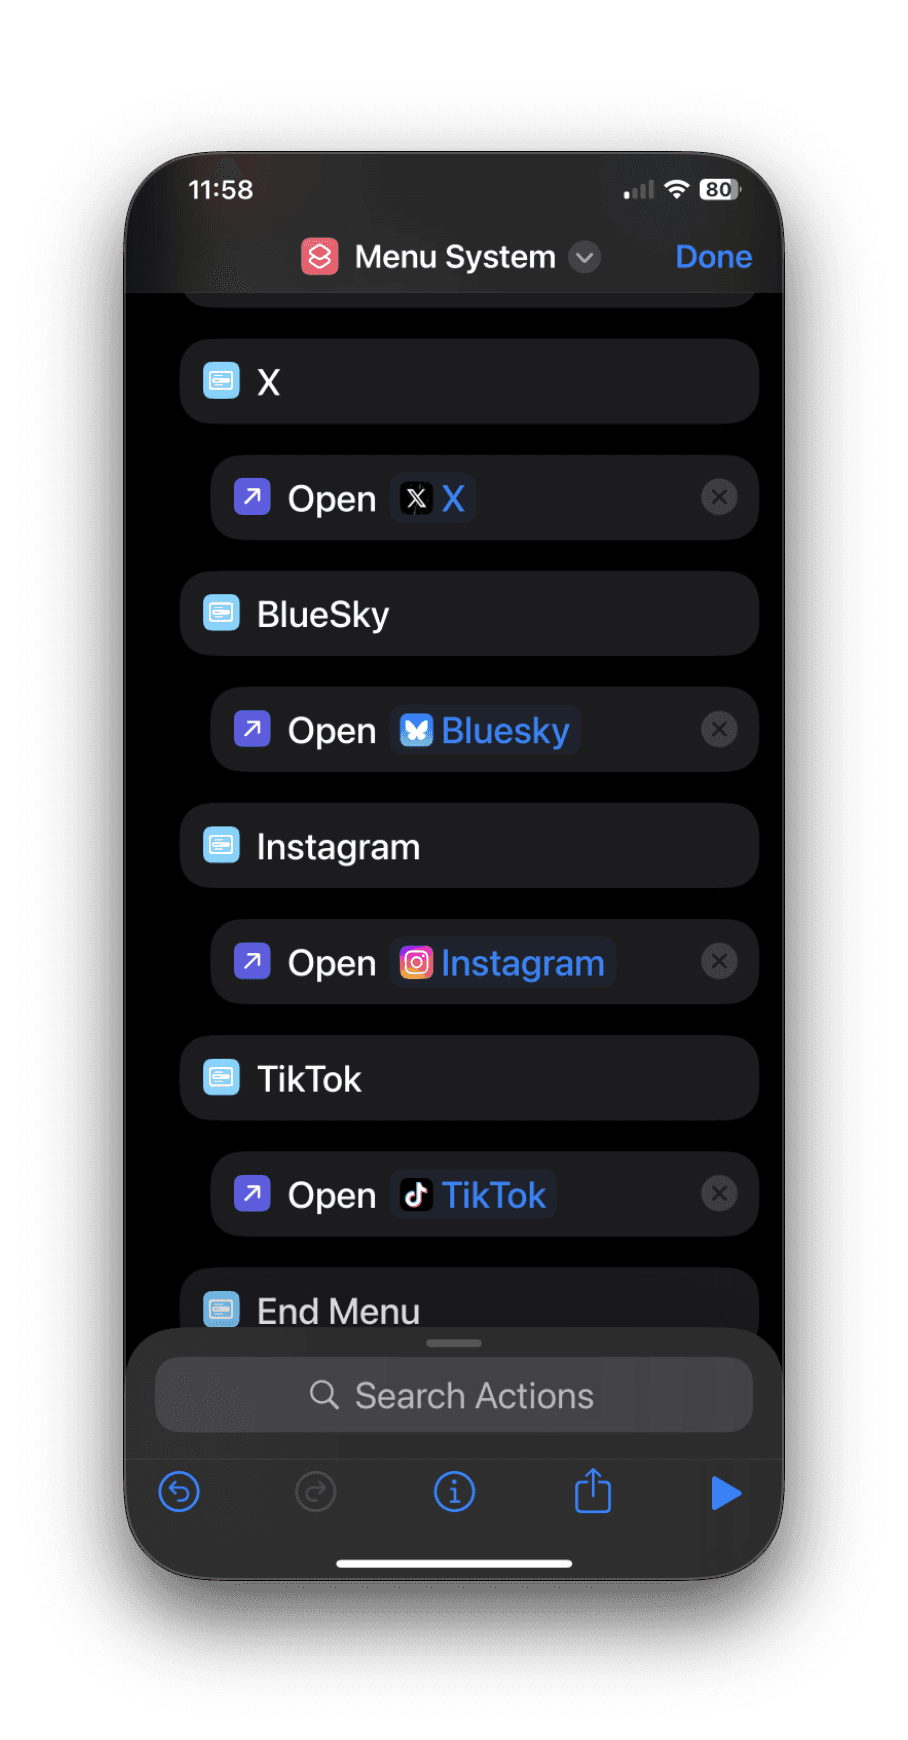
That’s all that’s left to do! Now, let’s test and add more apps to the categories and enjoy.
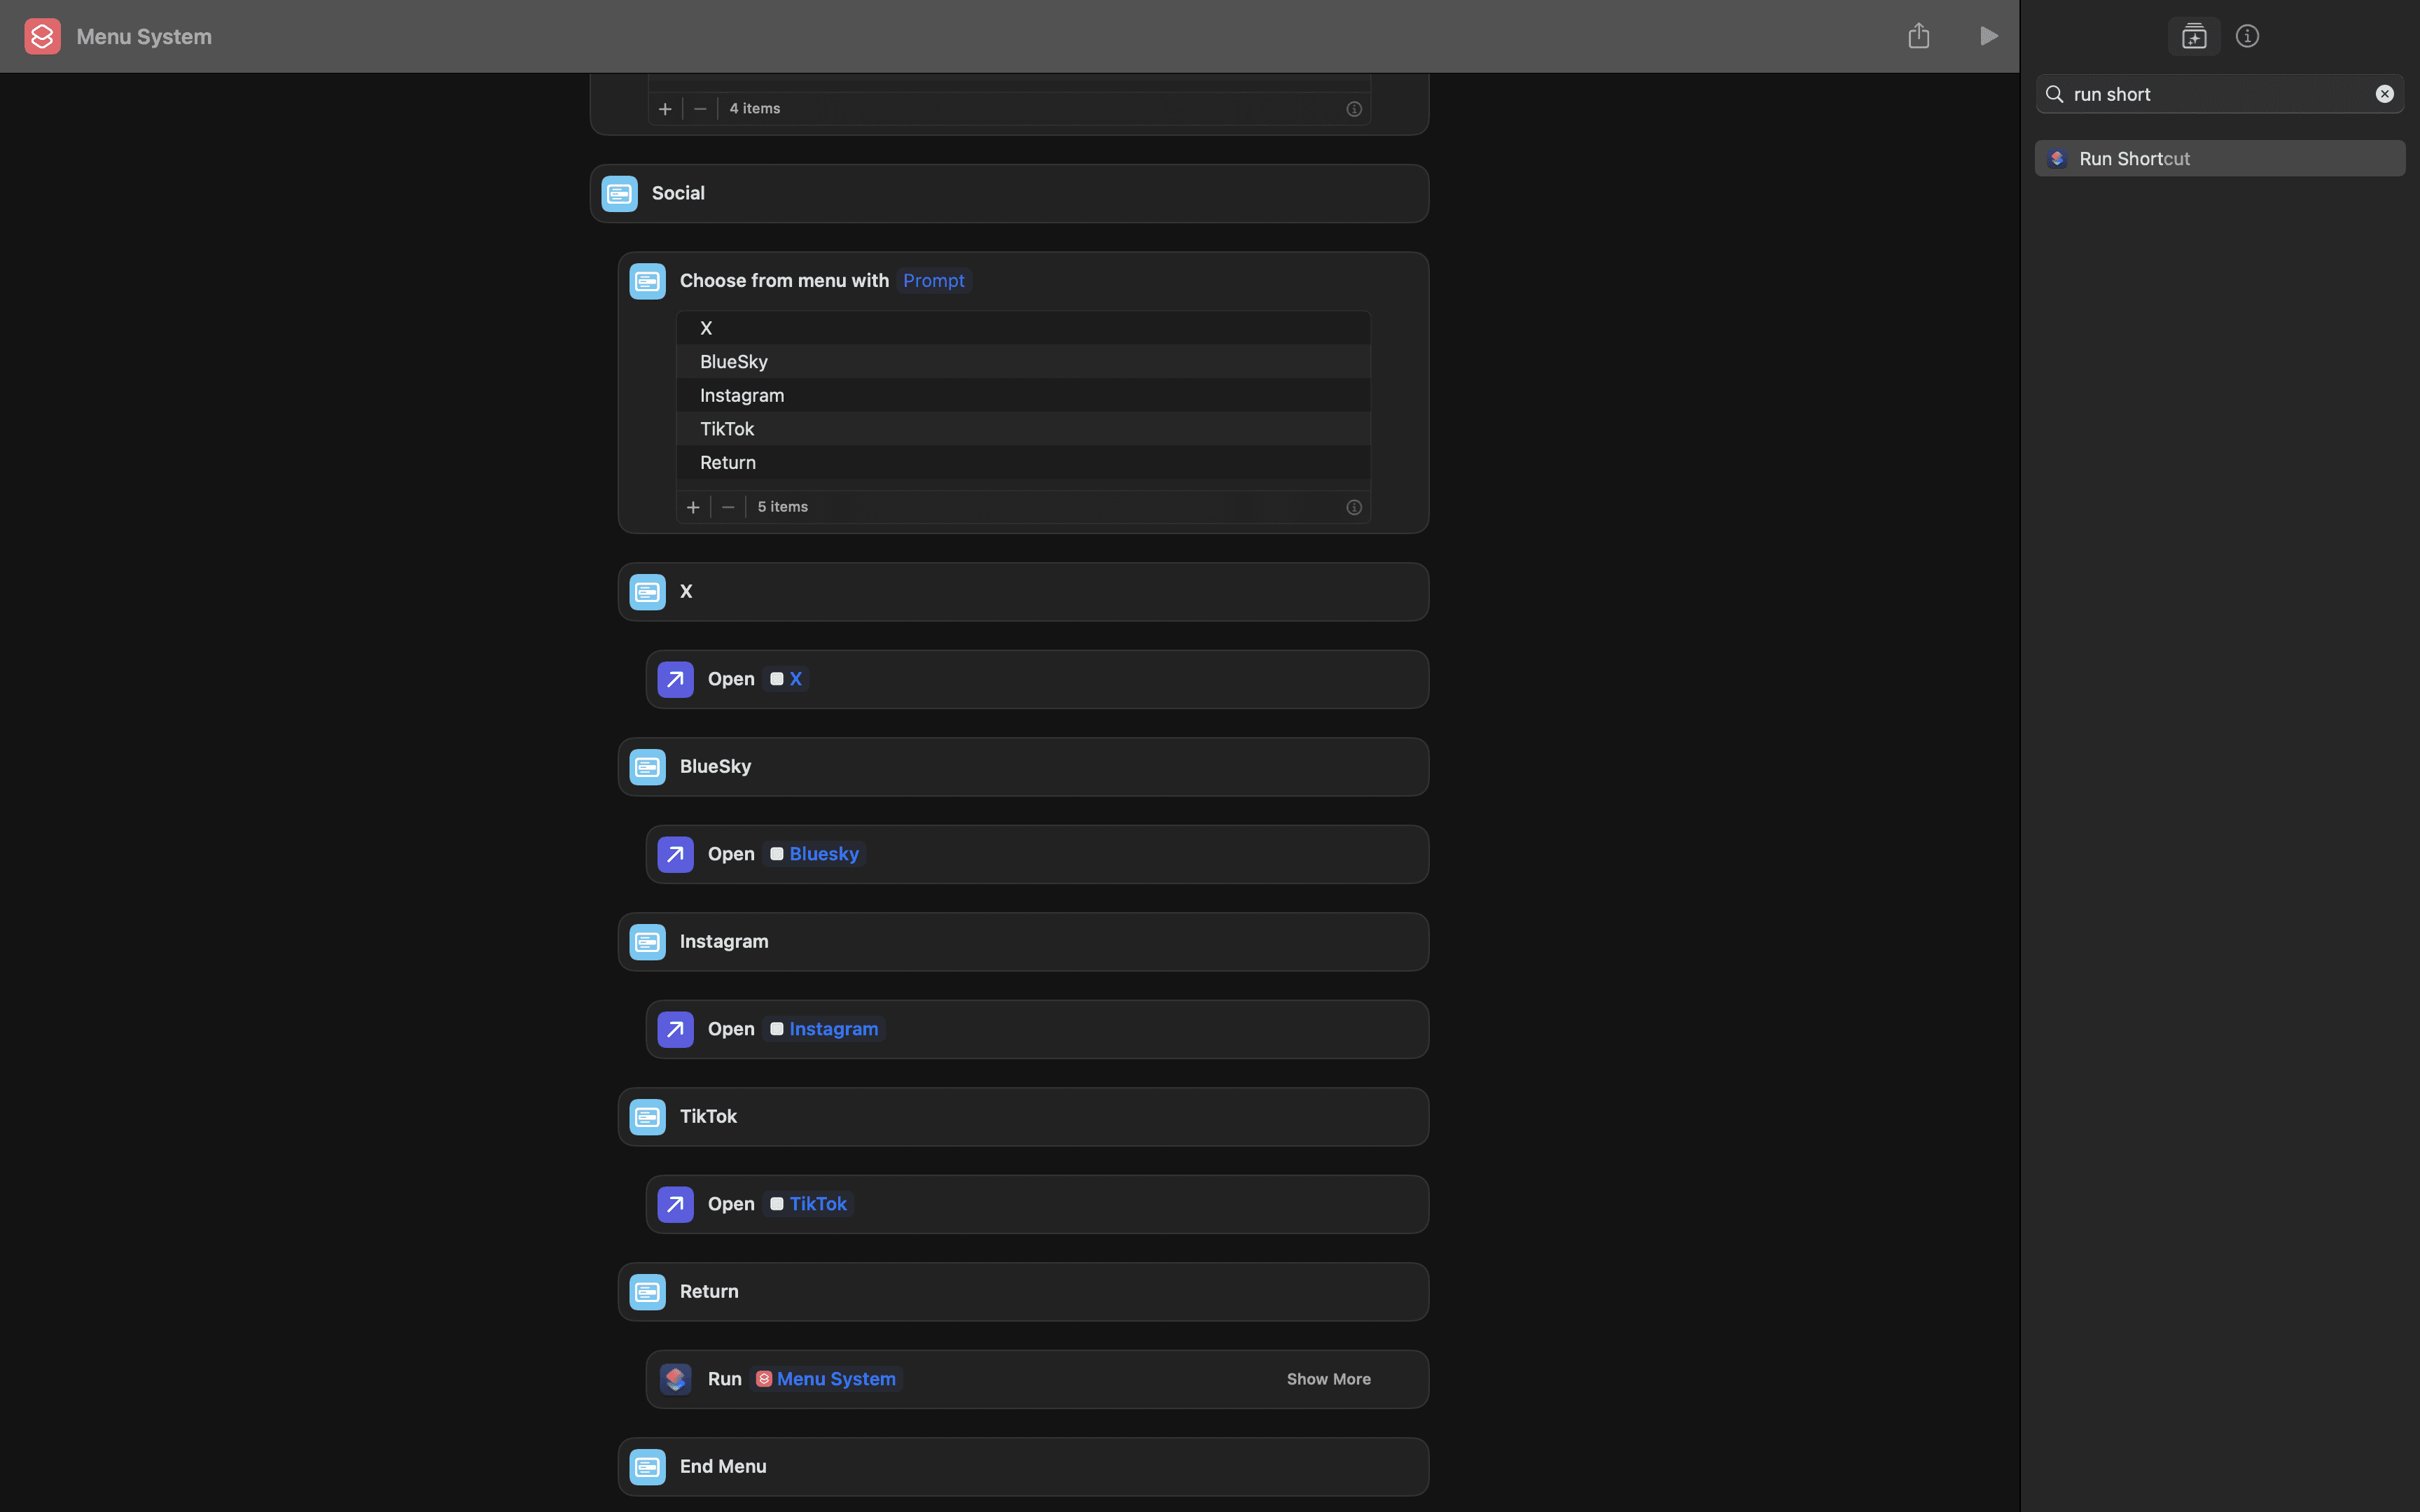
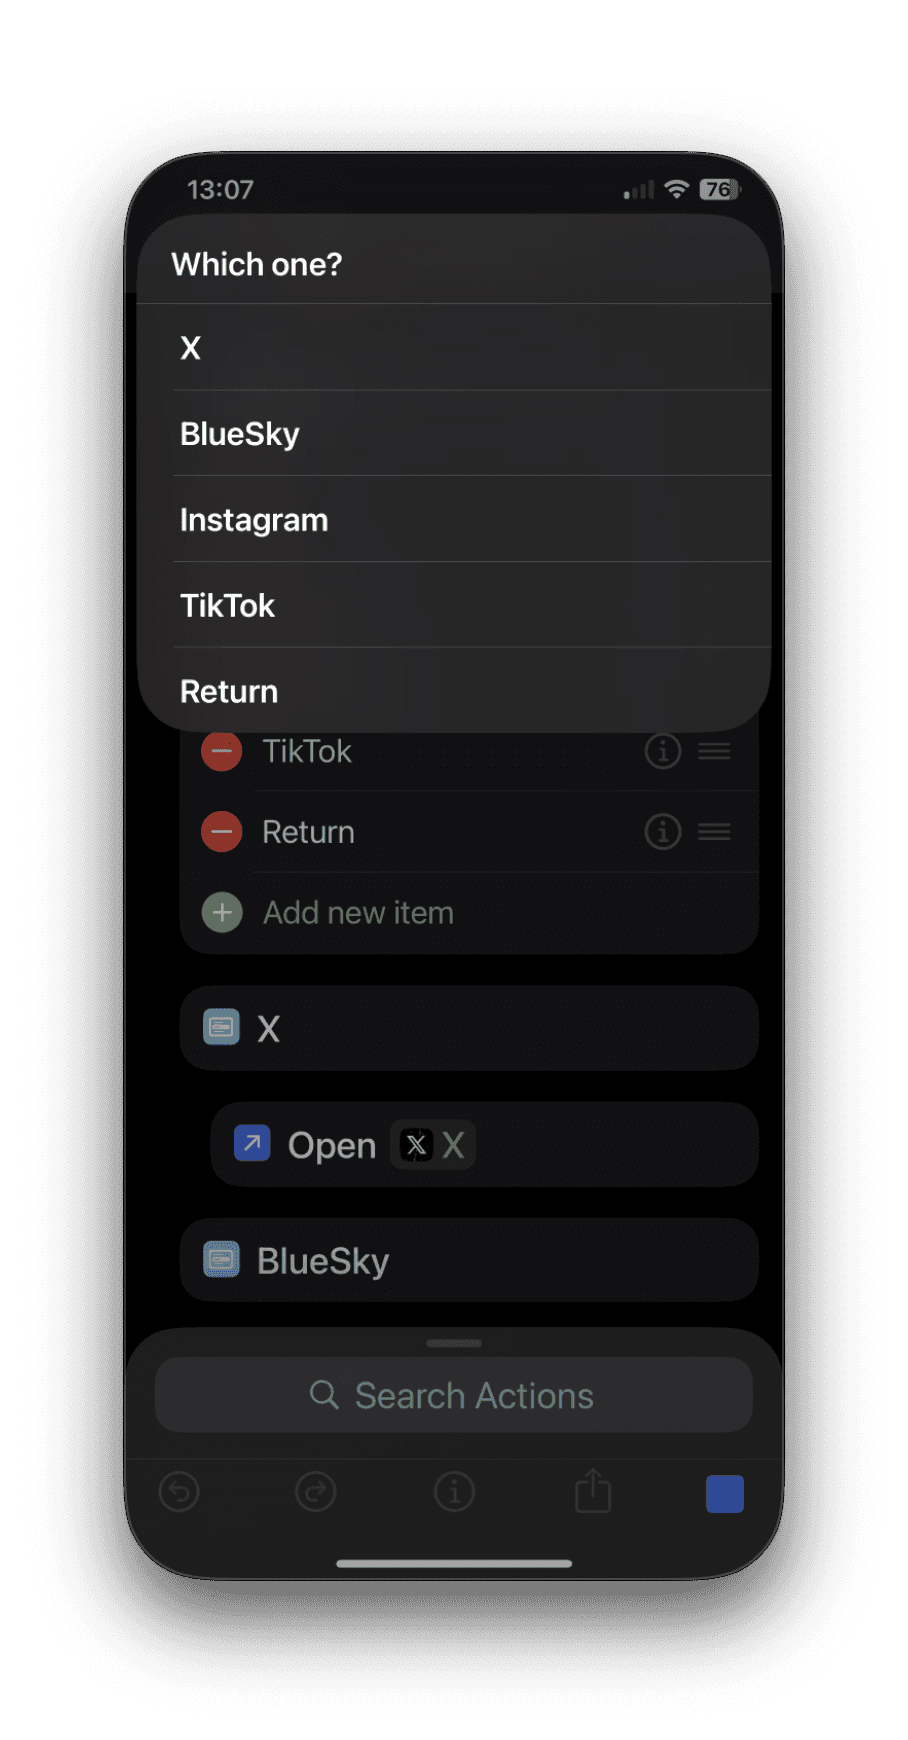
I have an idea for a small improvement to the menu system. If you accidentally select the wrong menu item or change your mind, you could add a new menu item called ‘Return’. Instead of using the Open App action, add a Run Shortcut action and select this shortcut. That way, you can easily undo your selection and get back to the original menu. What do you think?
As always, if you want to be cover anything or even clarify anything please contact me from the About page.
Comments