Estimated Time Of Arrival.
Create a custom ETA shortcut for iOS. Learn to automate arrival time notifications for smoother commutes and better planning.
·
Oct 11, 2024

In this shortcut, we’ll create a quick shortcut that will estimate the driving travel time between the current location and a predefined location.
I often used this shortcut triggered by an NFC tag in my car to send a message to my wife with a configured message and the estimated driving travel time. Obviously, you could trigger this shortcut in multiple ways, when you leave a location, Bluetooth connection, back tap, or just action on the iOS device.
Let’s Get Started.
For the purpose of this shortcut, we’ll be setting the trigger to a NFC tag.
Open the Shortcuts application.
Select the Automation tab.
Select the + icon (top right)
Select the Create Personal Automation
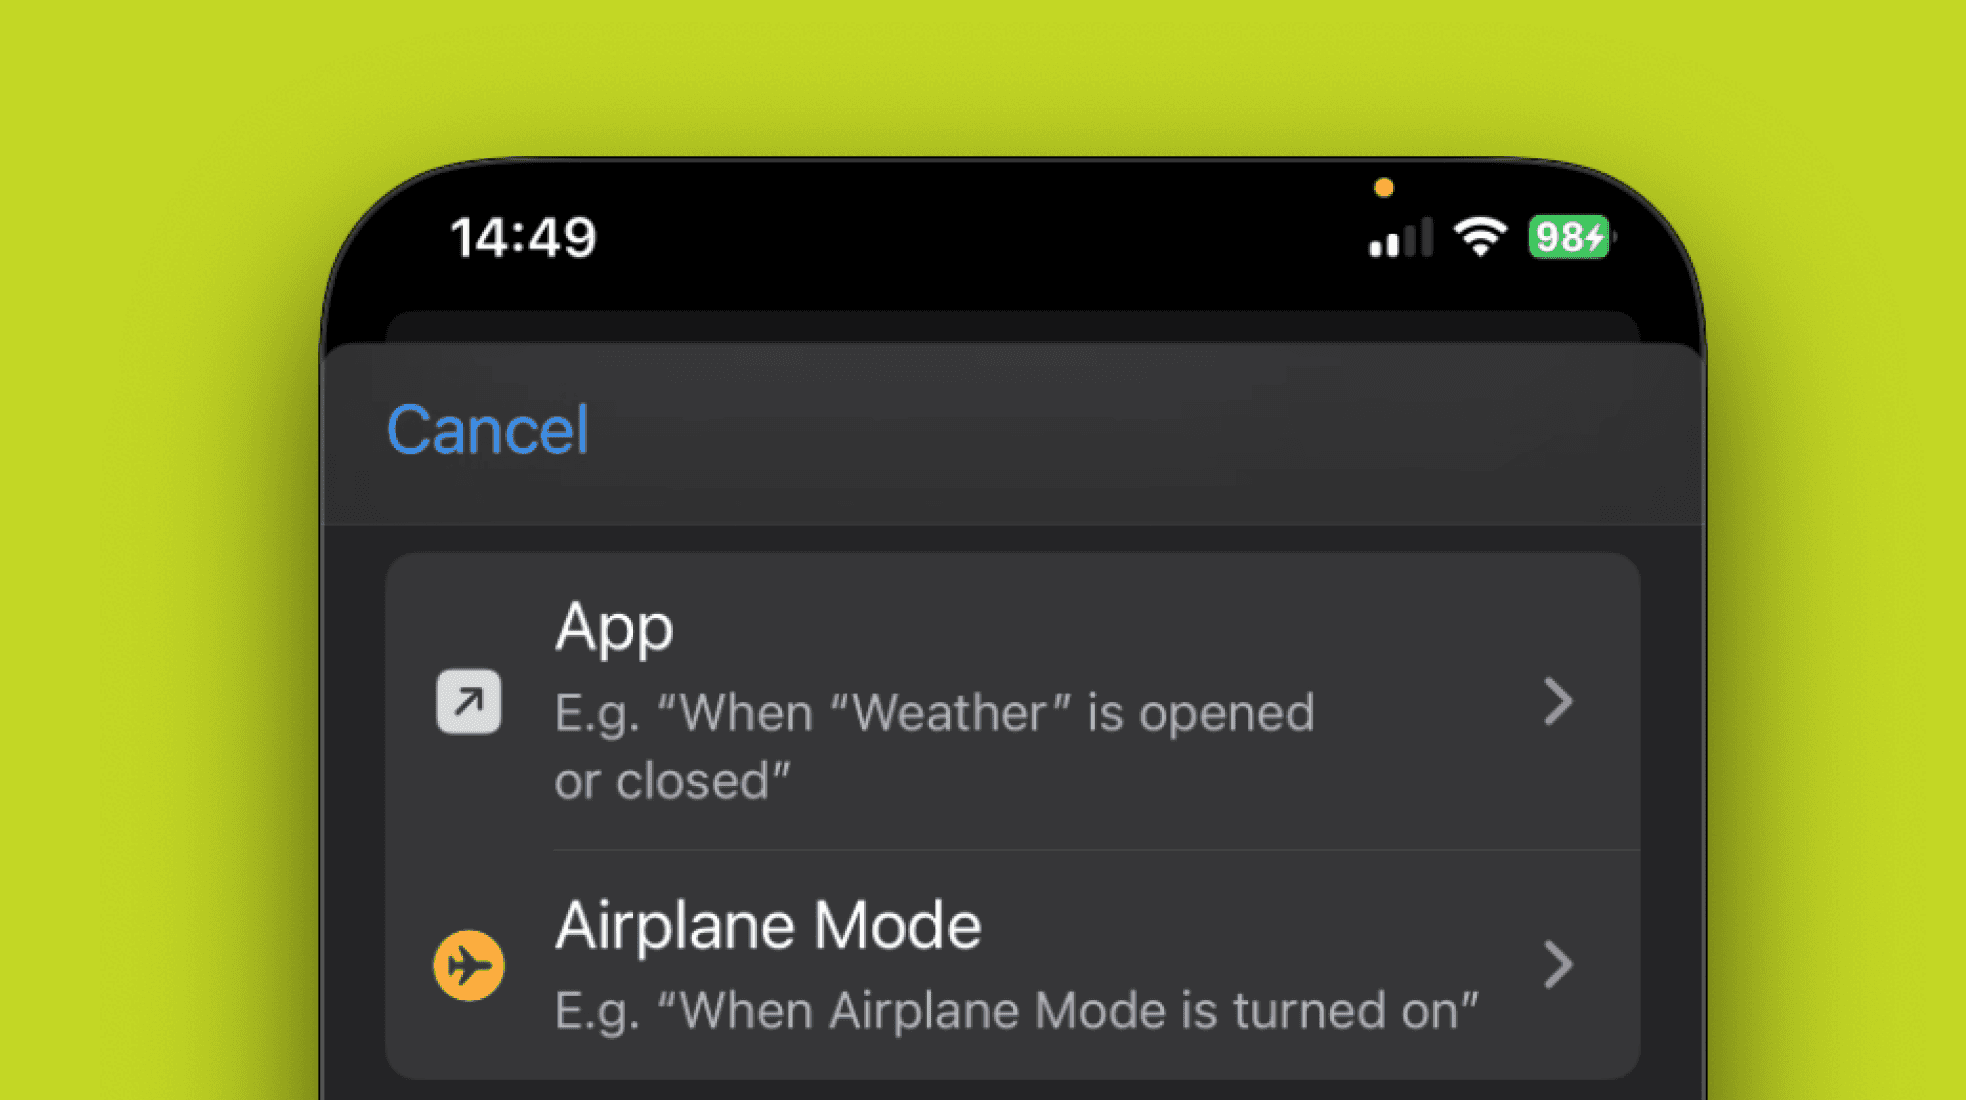
Scroll down and select NFC.
Here we need to pair / scan the NFC tag. Select scan when ready.
Hold the device over the NFC tag until selected.
Name the NFC tag. Select next when done. You will need to decide here whether you want the automation to Run After Confirmation or Run Immediately. For this shortcut I’ve selected Run Immediately.
At this point the trigger is set, and we can now build our shortcut.
Name the NFC tag. Select next when done. You will need to decide here whether you want the automation to Run After Confirmation or Run Immediately. For this shortcut I’ve selected Run Immediately.
At this point the trigger is set, and we can now build our shortcut.
Getting Current Location.
To start building the shortcut select New Blank Automation.
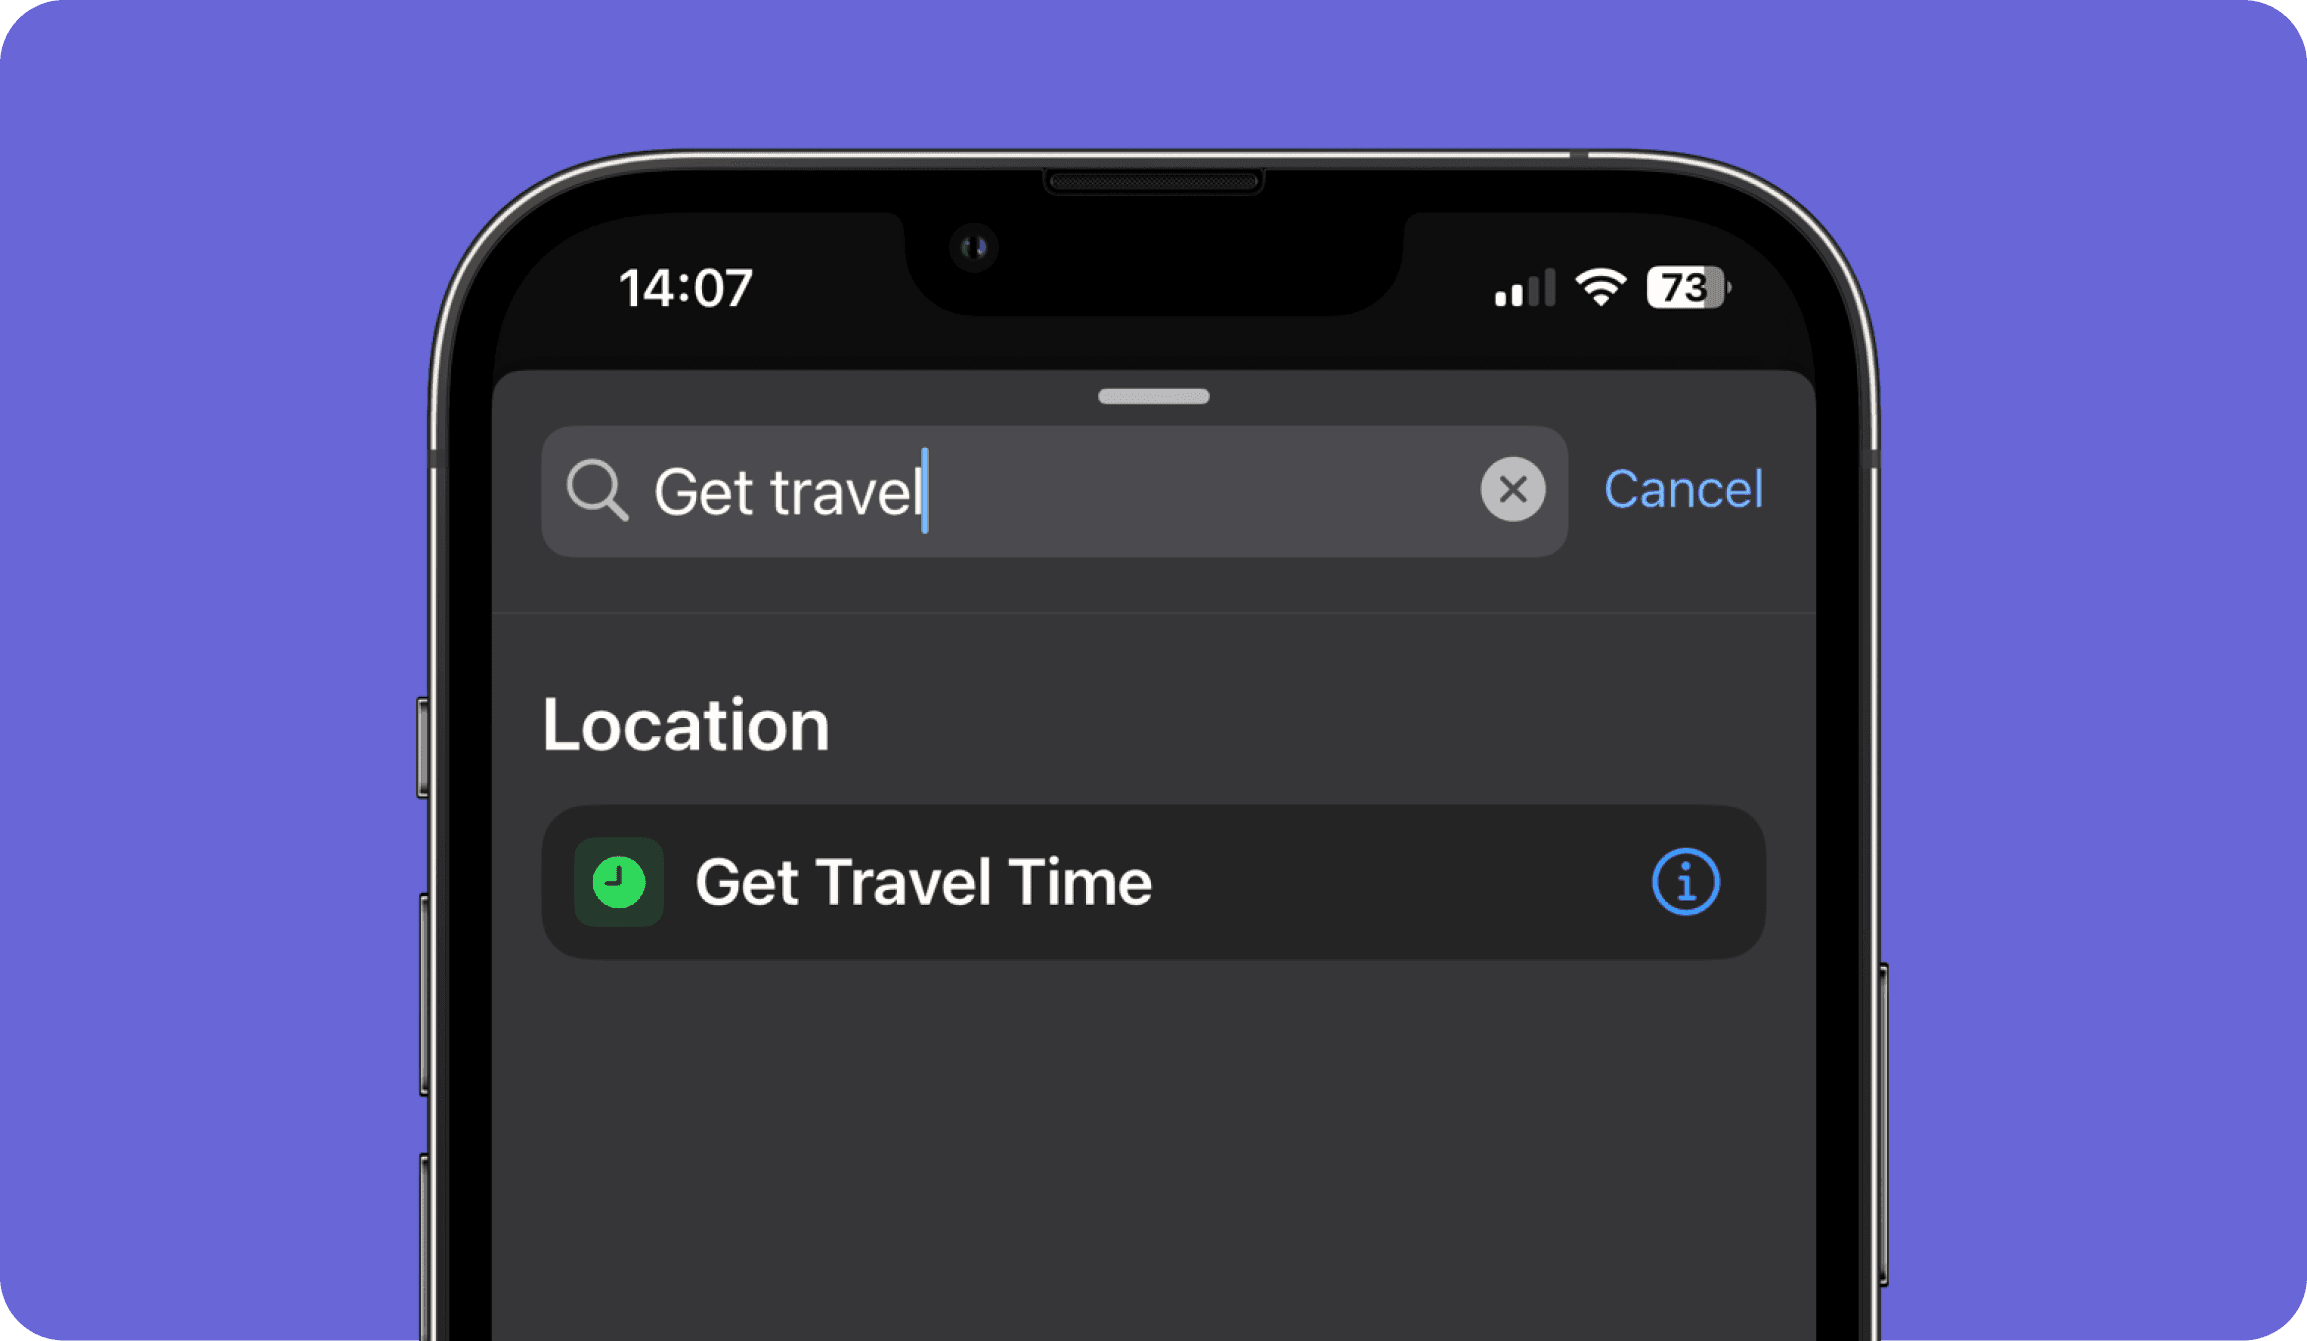
The first action we add to the shortcut is the Get Travel Time, this will calculate the travel time between the current location and entered location.
Once the action has been added, we just need to add an End Location. To do this, just select the blue variable named End Location.
You will then be presented with the Choose Location screen. Here you can either enter a town name or postcode or even a place of interest in a town i.e. Glasgow Cinema and select from the list which will be provided.
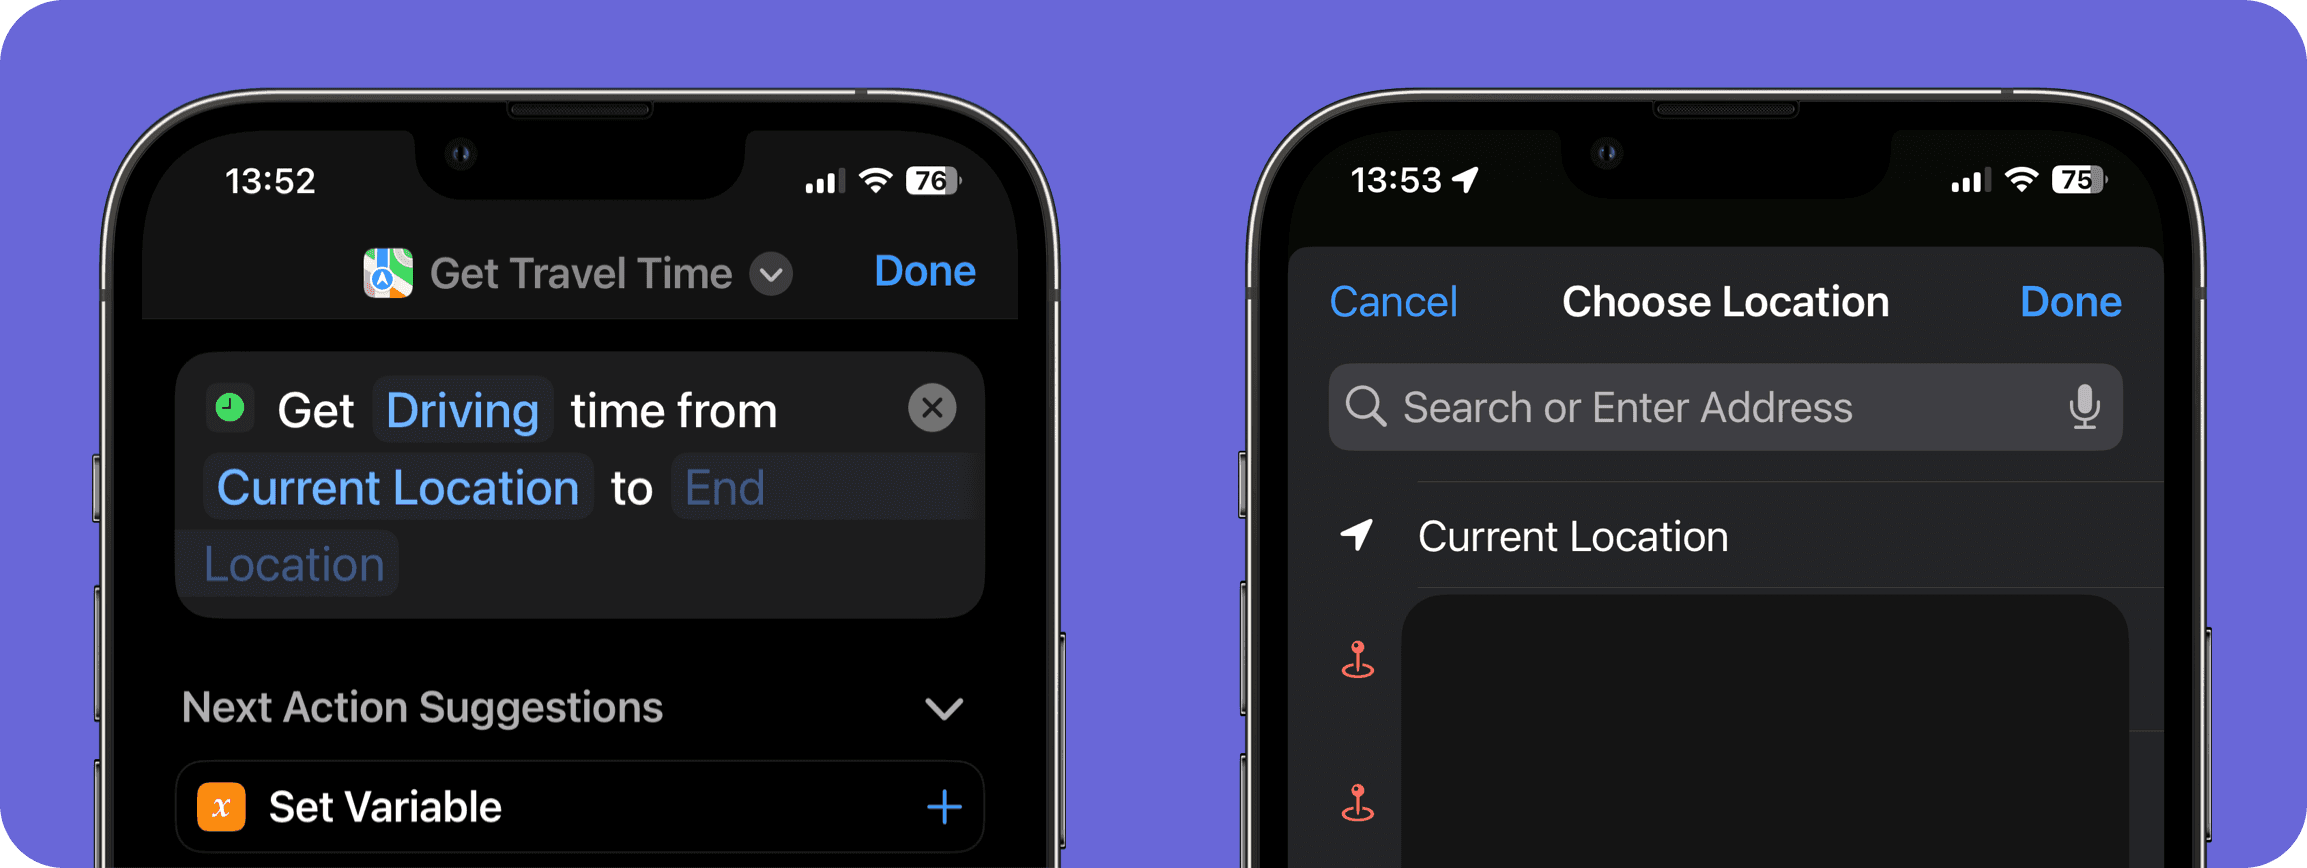
In my example, I’ve just chosen Glasgow town.
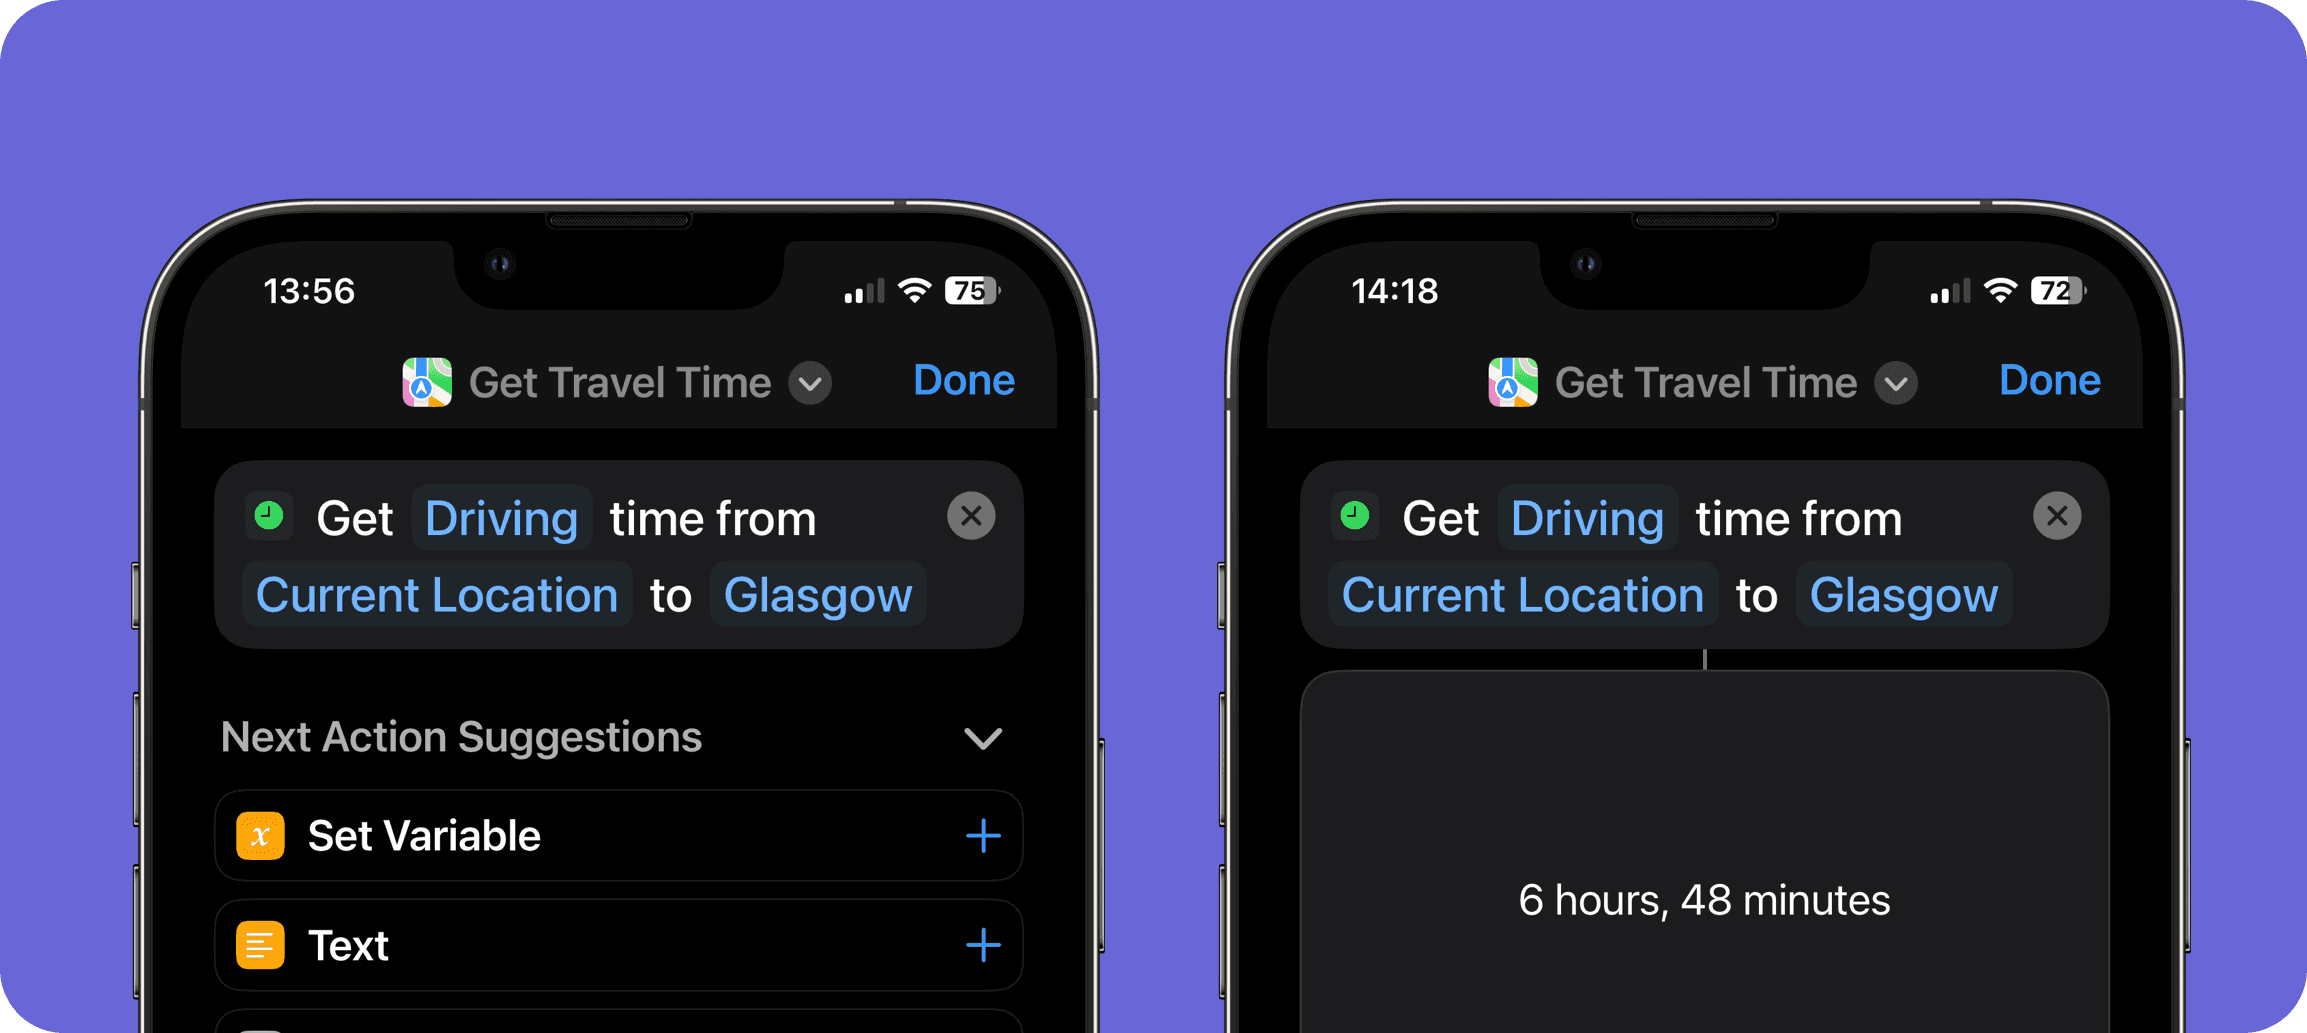
You can now as a test go ahead and run this shortcut. It will go and get the Driving travel time from your current location to Glasgow and display the output below. Just for fun, you can also change the travel method, I now know it will take me 5 days, 20 hours and 24 minutes to walk to Glasgow 🙂
So now we have the information we want, we’ve got the shortcut to work out travel time from our current location to our entered destination, but what do we do with this data now? Well, you could do several things, you could just have the shortcut read out aloud the travel time to you if you wanted to, or email the information to someone or as I have done send that information along with a customised message in a message to a recipient.
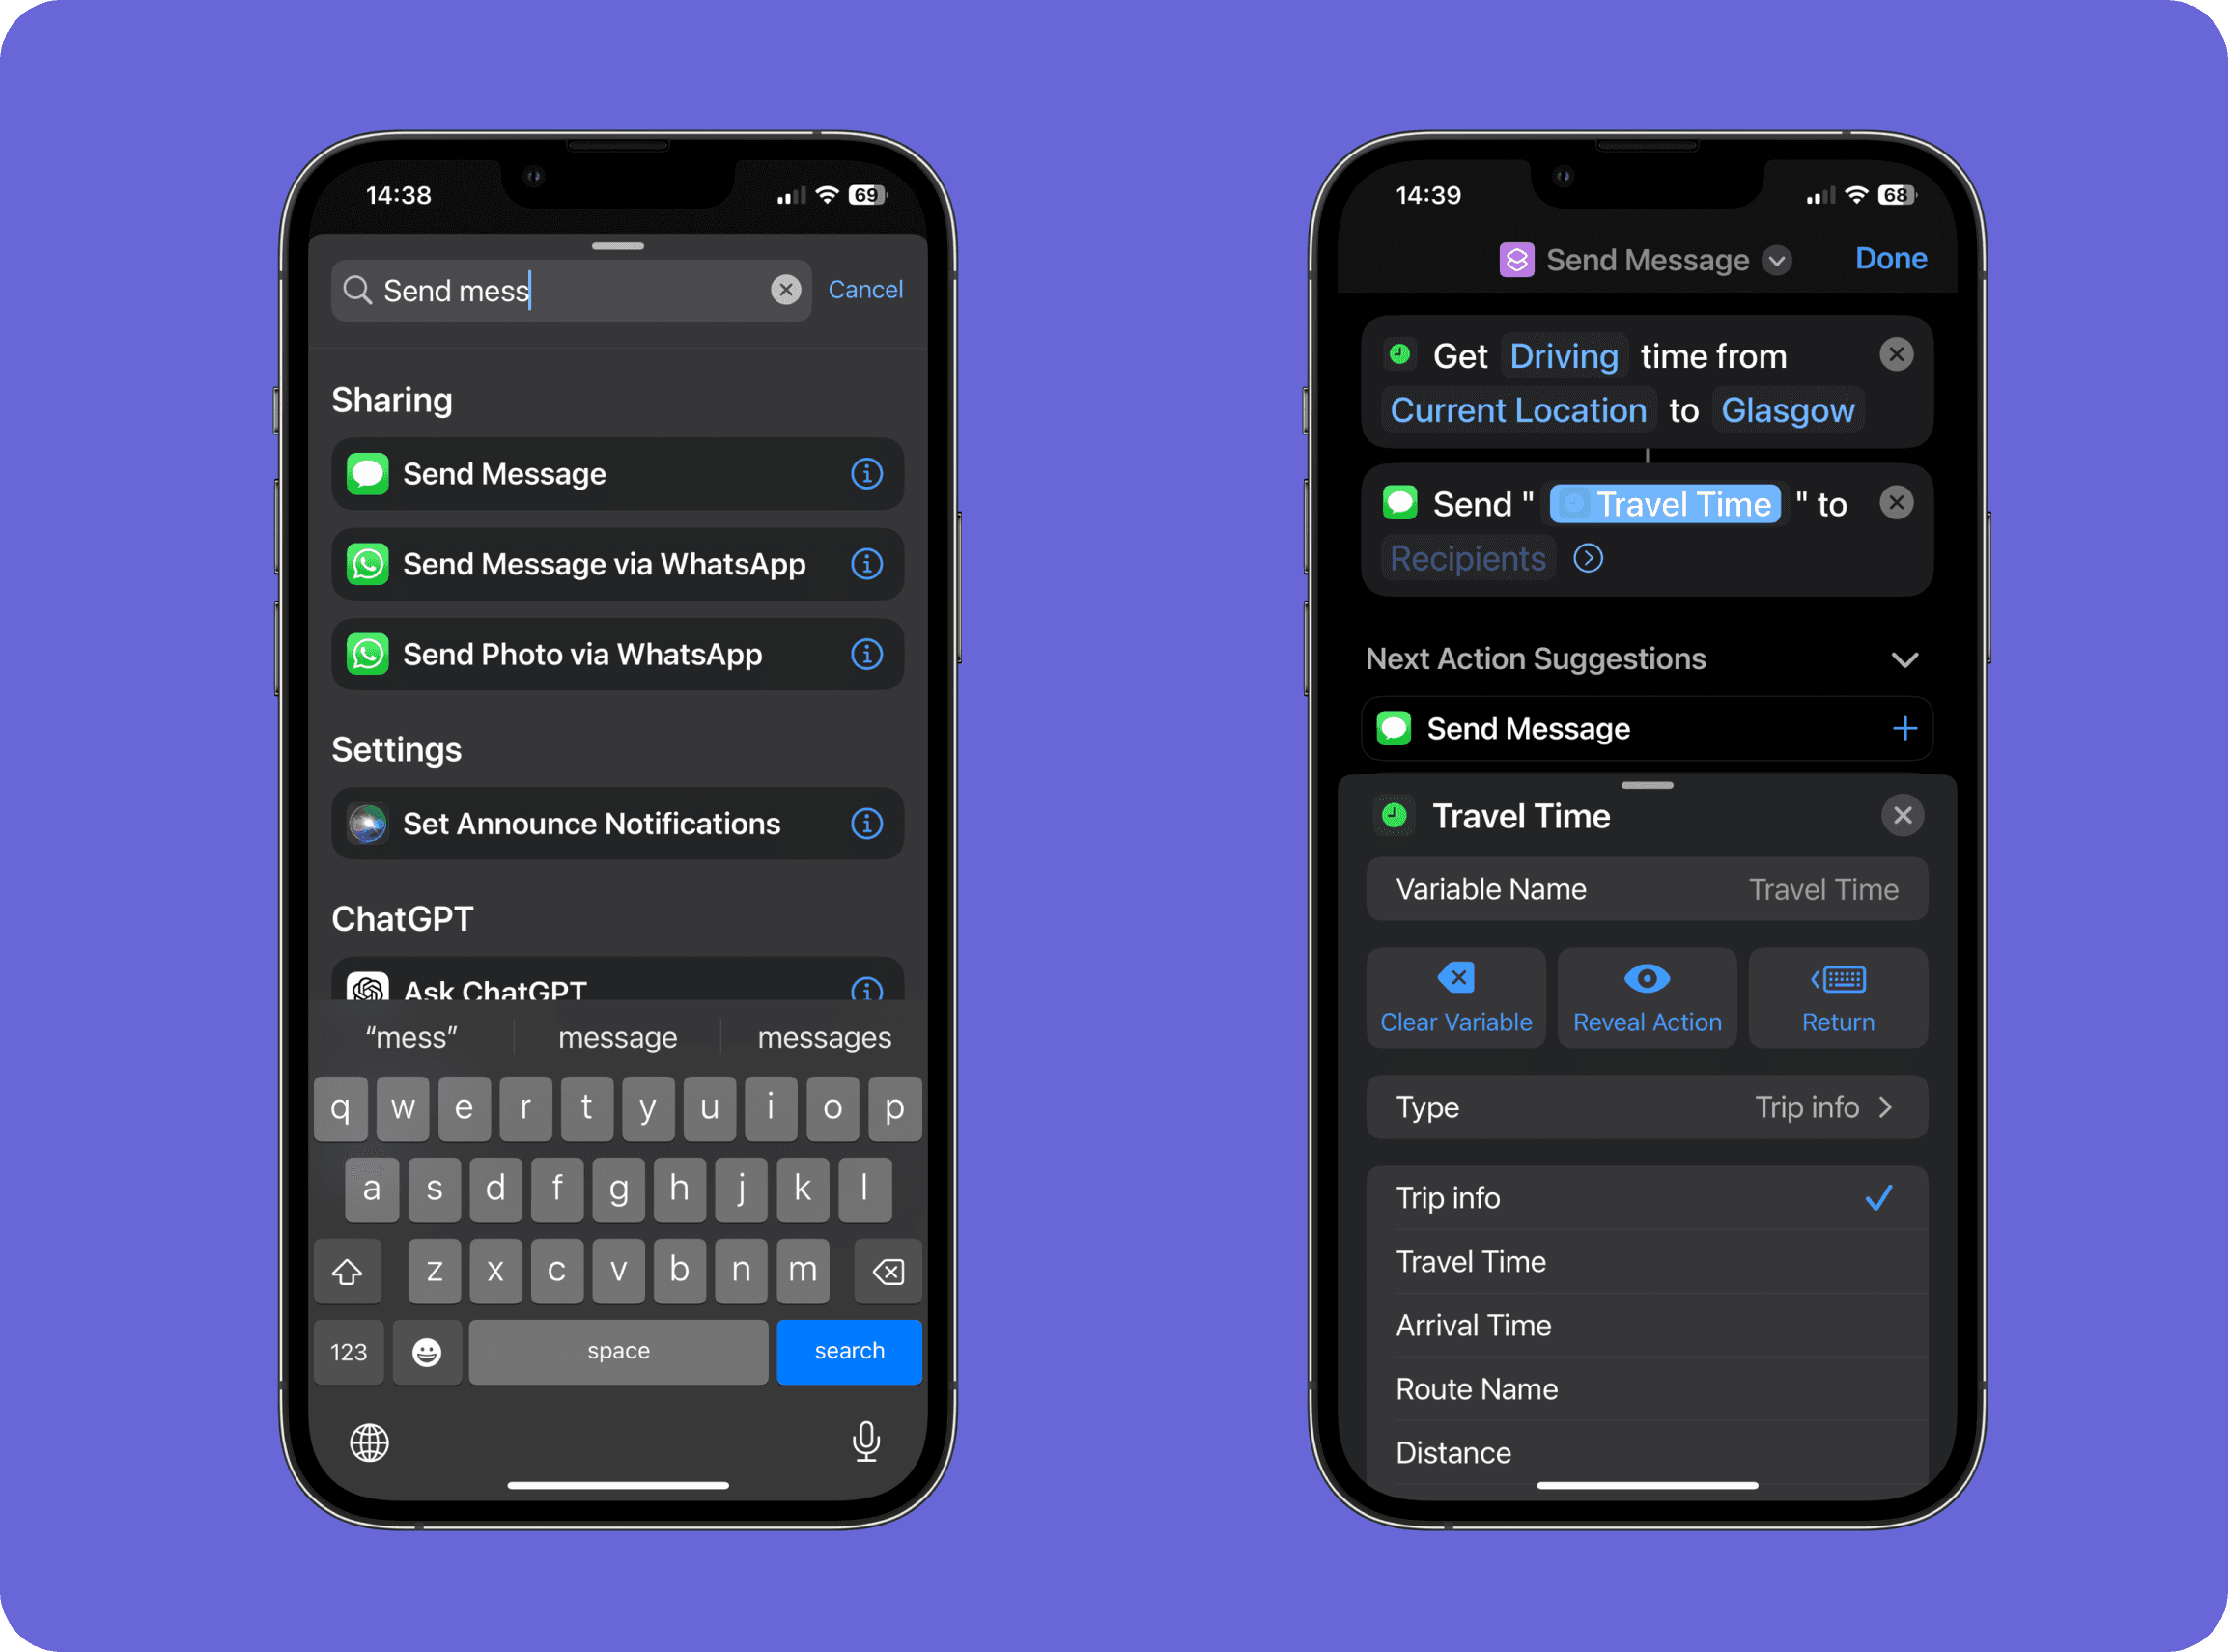
To send the travel time via a message search and add the Send Message action to the shortcut.
You will notice that the Travel Time information has already been populated into the Message action. Now adding a customised message around the travel time is a little tricky. Firstly select the Travel Time variable in the Message action and a panel will appear below with a few options, if you select the Return icon (which has a keyboard icon above it) this will now allow you to move the cursor (press and hold the space bar on keyboard) to either before or after the Travel Time variable.
You will also notice within this panel you can adjust the data that you send in the message, for example you could send the Arrival Time or Distance instead.
Conclusion
This is my finished shortcut. One very important thing to add is if you want this shortcut to run automatically then make sure the Show When Run option is turned off within the Message action, otherwise the shortcut will run and then display the Message and wait for you to send it. Also, ensure that the trigger (NFC tag) is set to Run Immediately.
Comments